·9 minutos de leitura
How to Set Up Your First Pakt: Step-by-step Guide

Maria Nimfuehr
Growth marketing lead
Pakt is a firewall between your AI agent and your money. This guide takes you from sign-up to your first guarded trade on Hyperliquid in about 20 minutes.
An agent can already run your trading strategy. It trades around the clock, does the maths faster than you, and has no emotions about taking profit. The catch is that one agent hallucination could spoil months of good trading, or a prompt injection could drain your account, and until now the best protection was handing it a small wallet and crossing your fingers.
Pakt changes that. You write the rules once, in plain language. Pakt compiles them into a machine-checkable policy, and every trade the agent proposes has to be proven to fit the policy before a key inside a secure enclave will sign it. The agent proposes. The proof decides. If the agent goes off-script, or gets compromised, the trade simply never gets signed.
This walkthrough shows the whole flow: creating an account, connecting Hyperliquid, installing the Pakt MCP in your agent, drafting a Pakt, enabling it and placing a first trade inside the rules.
Before you start
You need three things.
- An AI agent that supports remote MCP and browser sign-in. We used Claude Code throughout this guide, both inside VS Code and in a plain terminal. Codex, Claude Desktop, Gemini, OpenCode and any other MCP client work too.
- A Hyperliquid account with funds in it. If you already trade on Hyperliquid, you are set. If not, you will create one during step 3. You will need at least $20 USDC on Hyperliquid to make Pakts.
- Beta access to Pakt. Pakt is in closed beta. You apply at usepakt.ai, and the team approves accounts in batches.
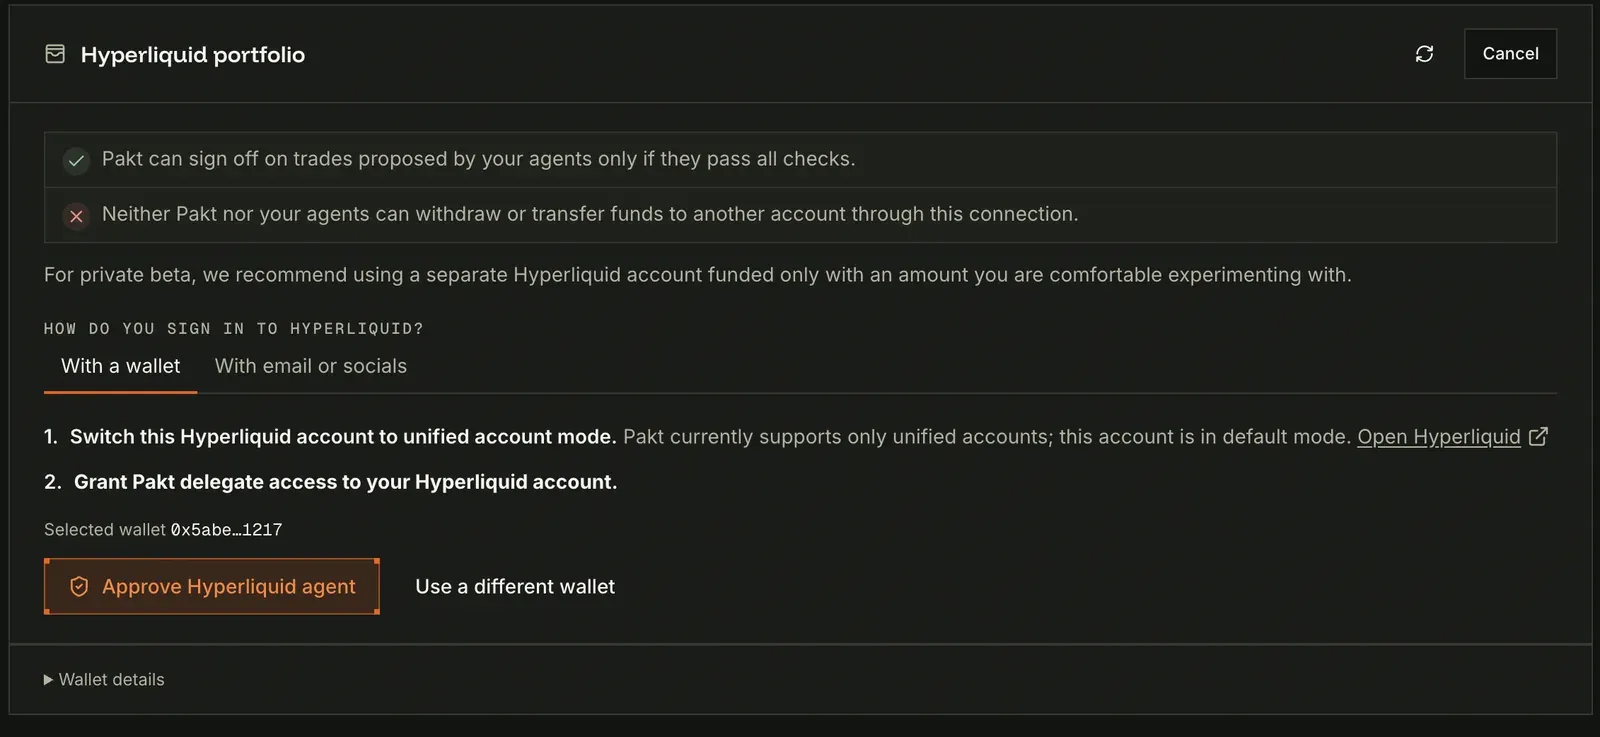
Two ways to sign in to Hyperliquid, two slightly different flows. If you access Hyperliquid with a browser wallet (MetaMask, Rabby and so on), you will connect that wallet to Pakt and sign one approval message. If you set up Hyperliquid through social sign-on, Pakt offers an alternative path through the Hyperliquid API. Both end in the same place: Pakt's agent wallet is approved to trade on your account but can never withdraw or transfer funds.
Step 1. Apply for beta access and sign up
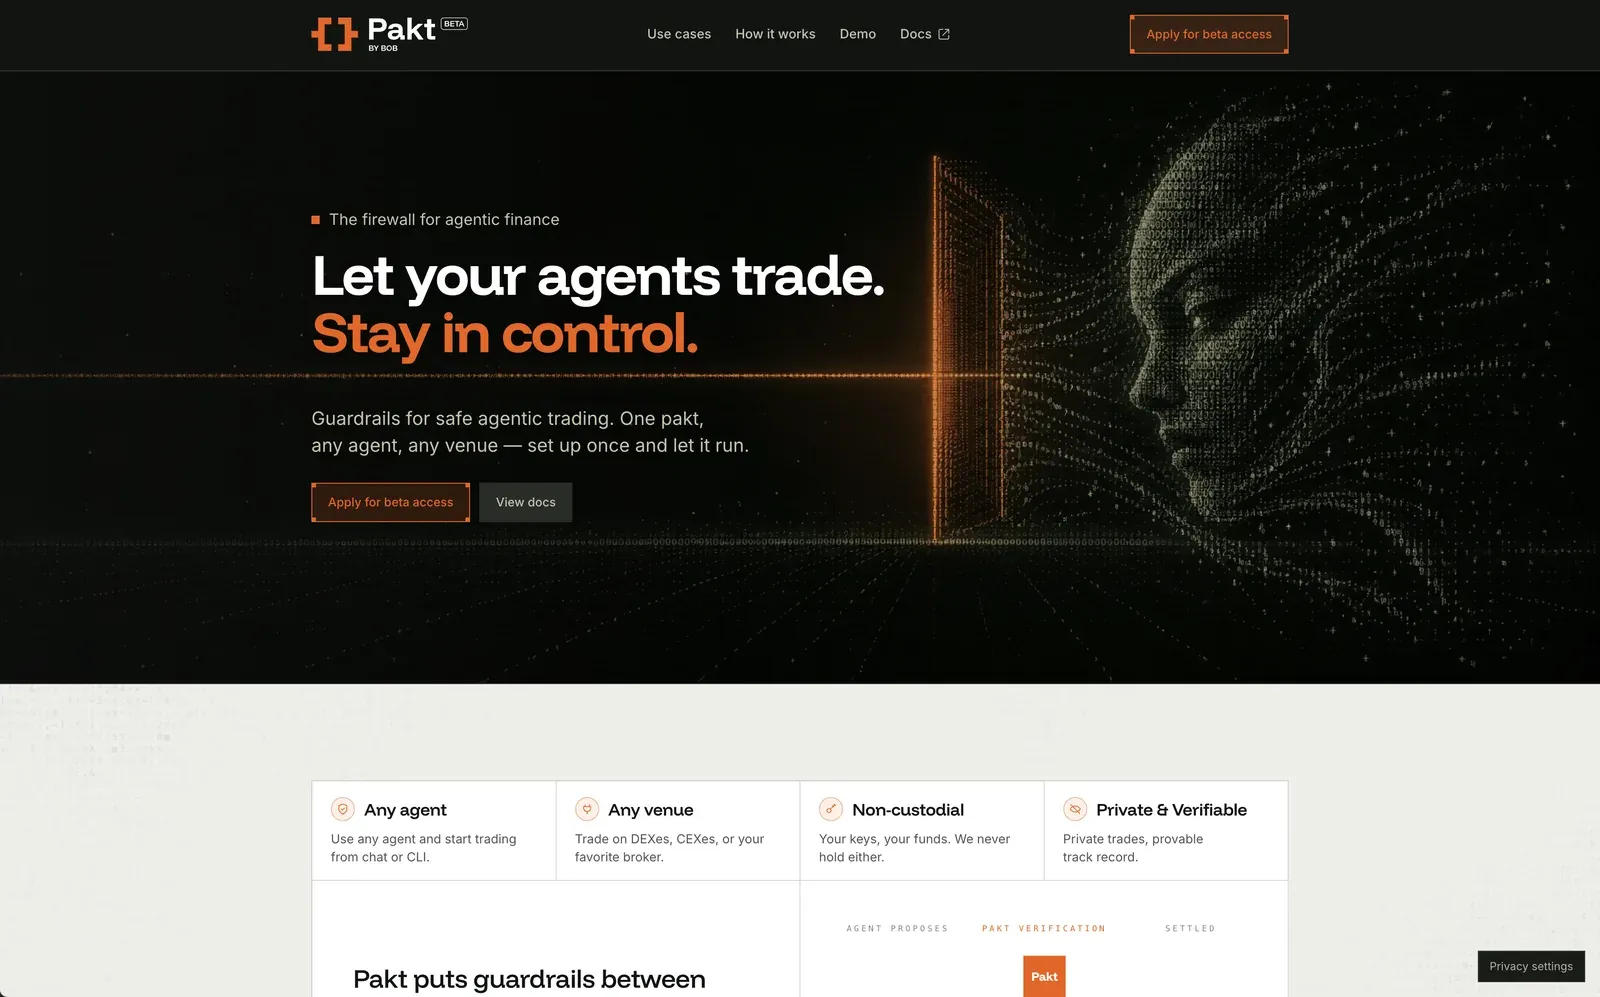
Go to usepakt.ai and click Apply for beta access, then continue to sign up.
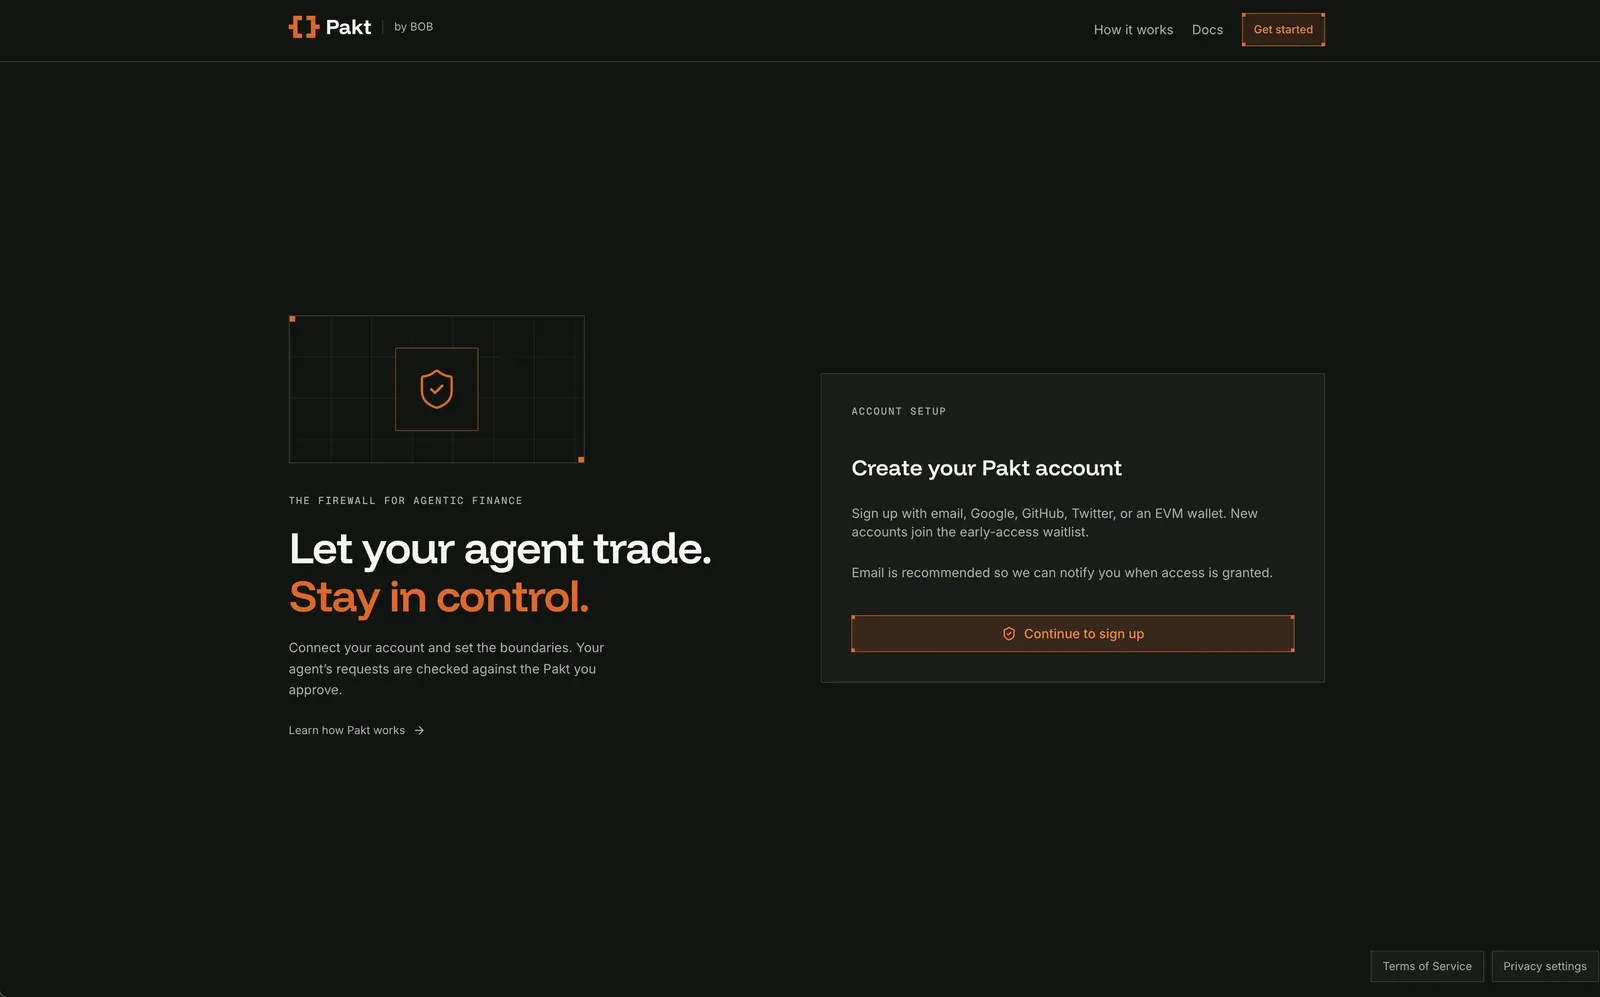
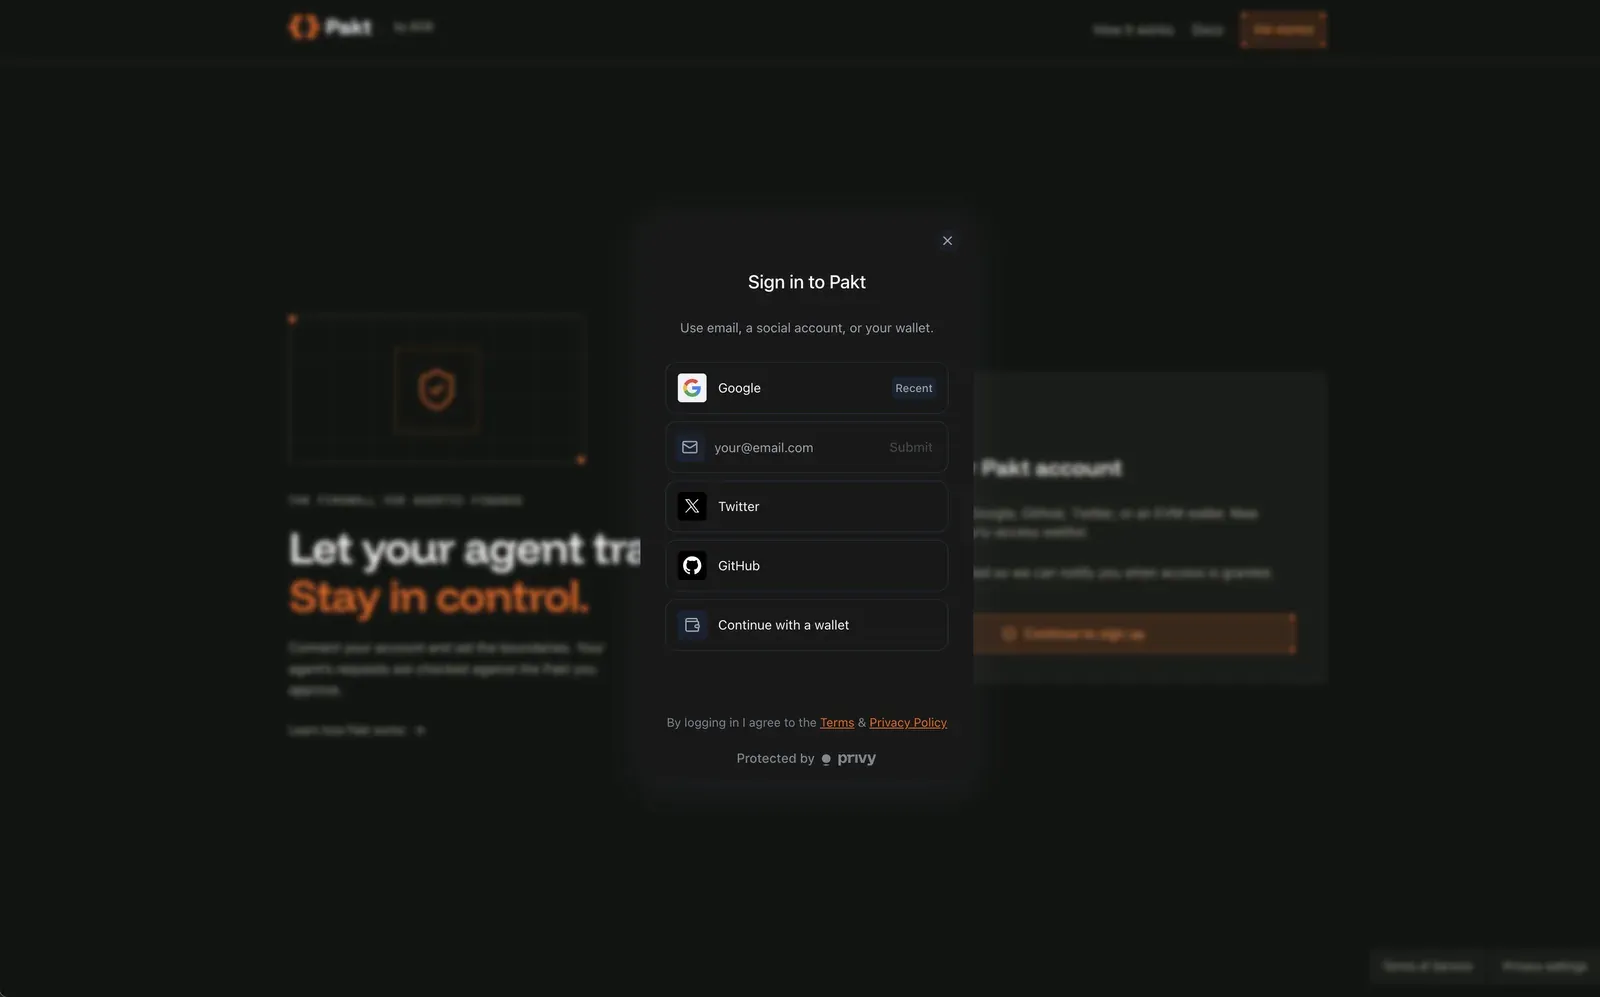
Choose a login method. Email works: you receive a code to confirm the registration. Social logins and wallet sign-in work too.
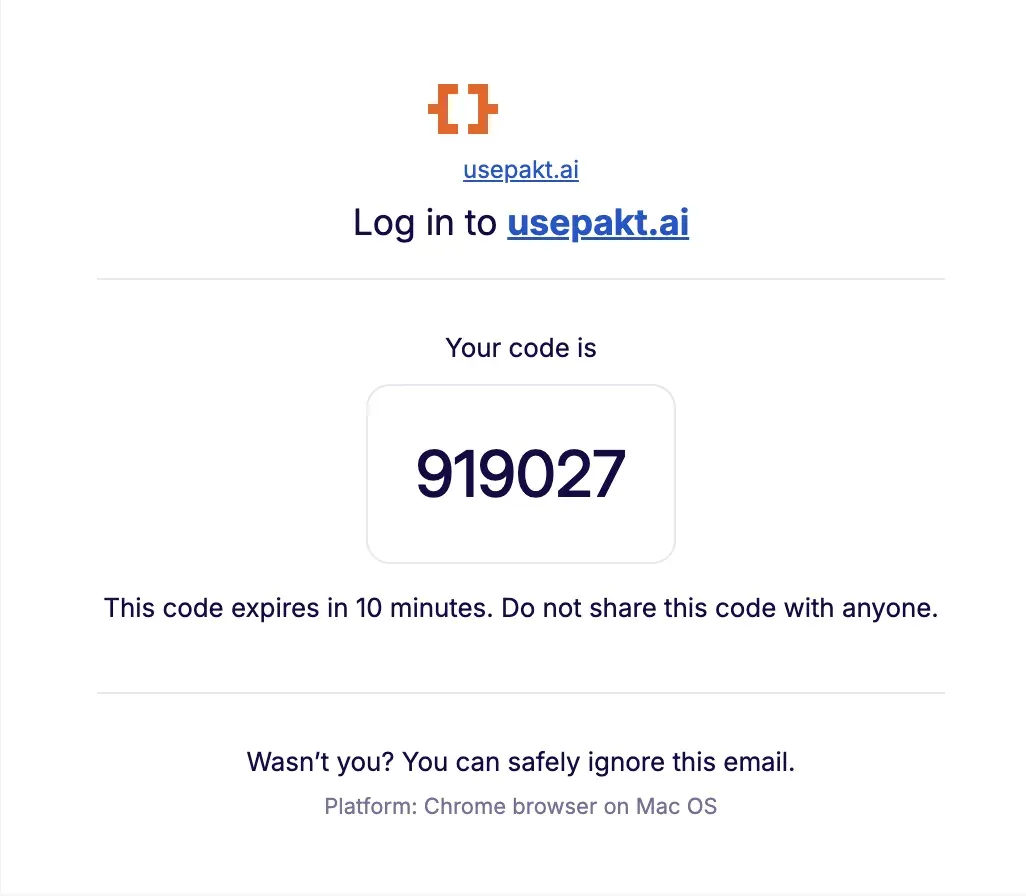
Whatever you pick, Pakt creates a Privy wallet for you in the background. This is your Pakt signer. It lives inside a trusted execution environment (TEE), so your agent can only reach it through Pakt, and you will use it later to approve or disable Pakts.
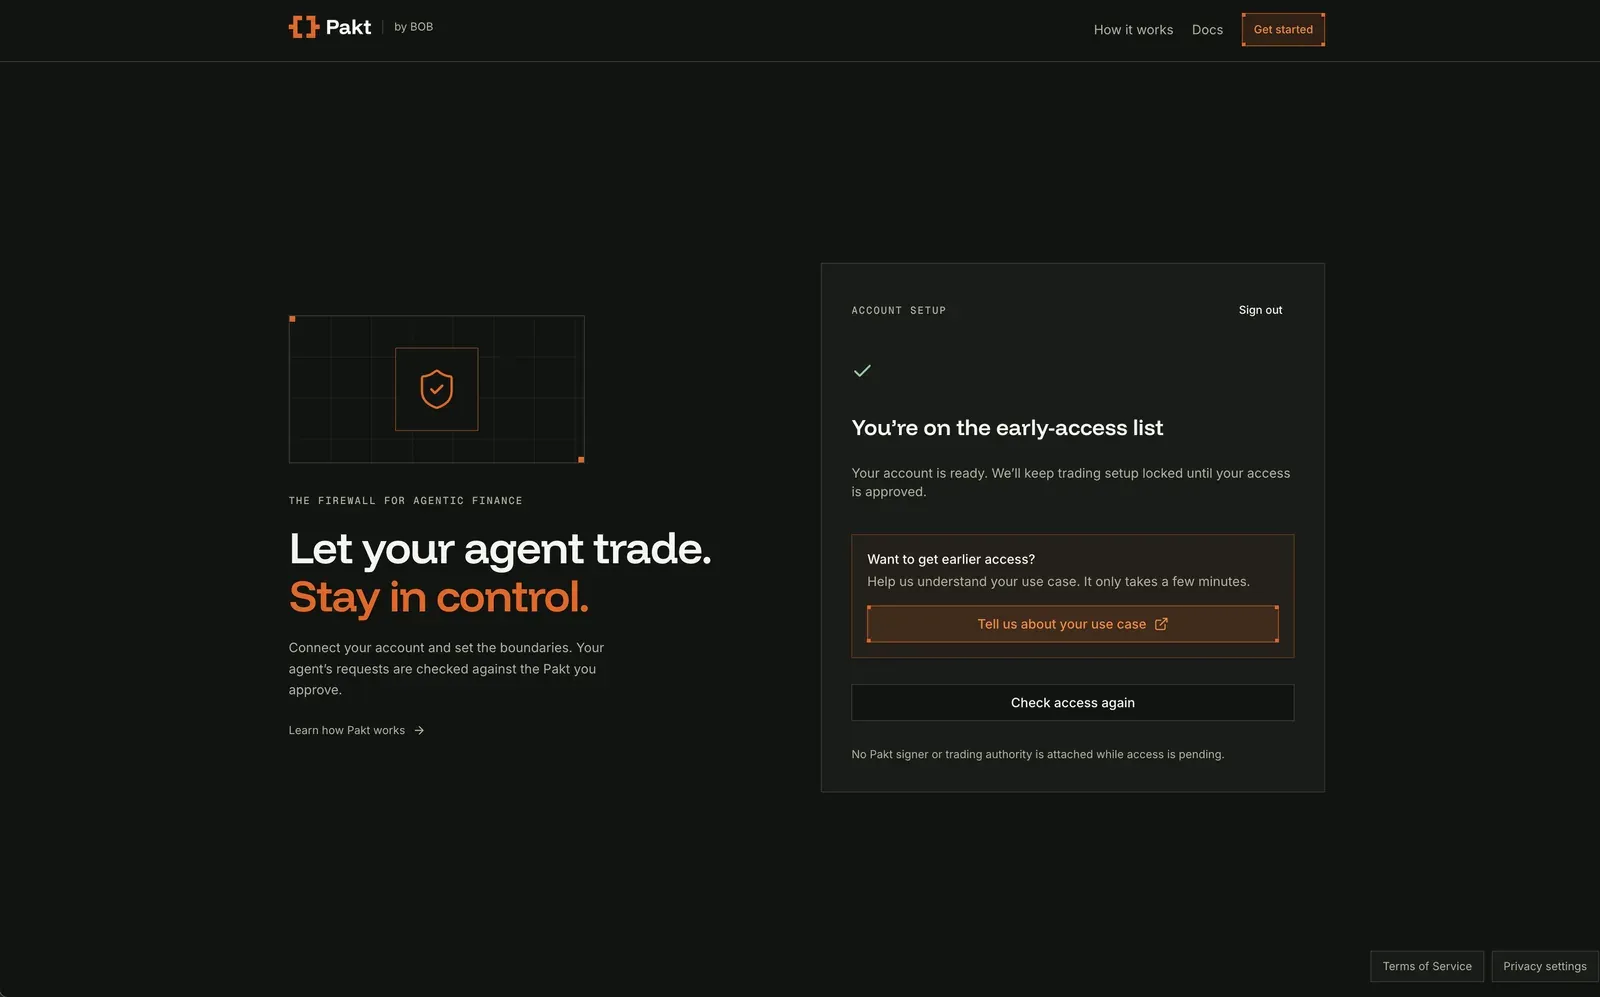
Until your account is approved you land on the early-access list. There is an optional form to tell us what you plan to do with Pakt, and a Check access again button.
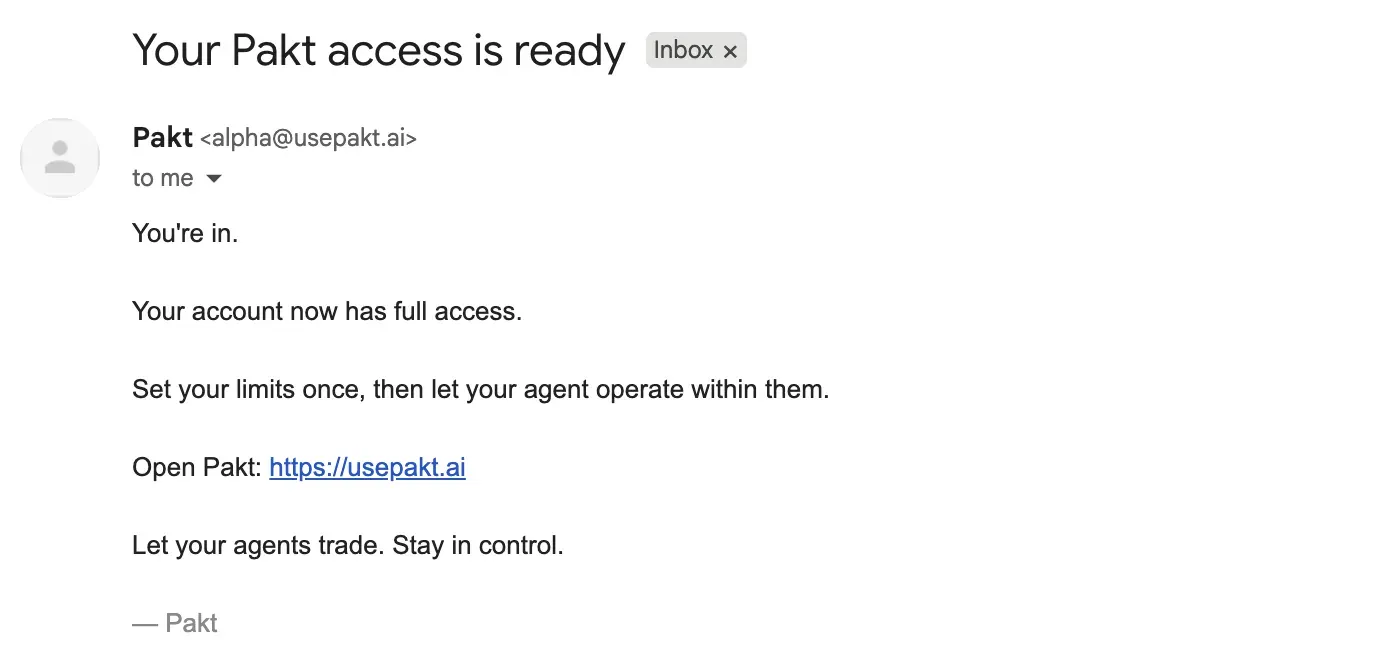
You will get an email when you are promoted to full trading access.
Step 2. Meet the dashboard
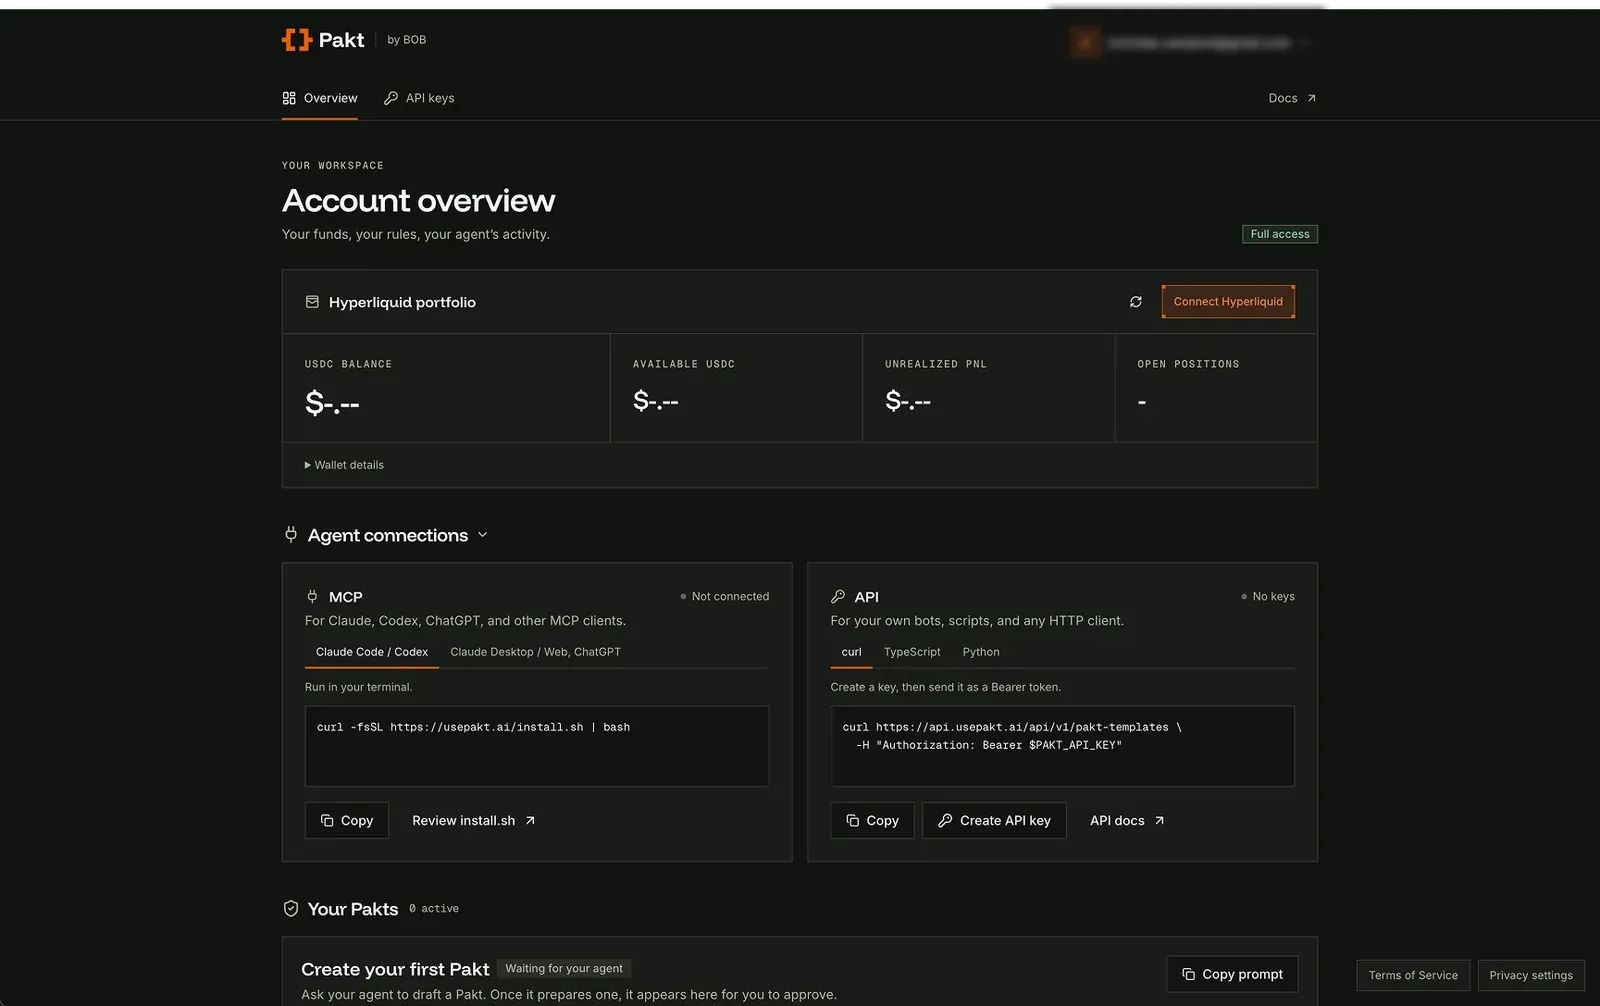
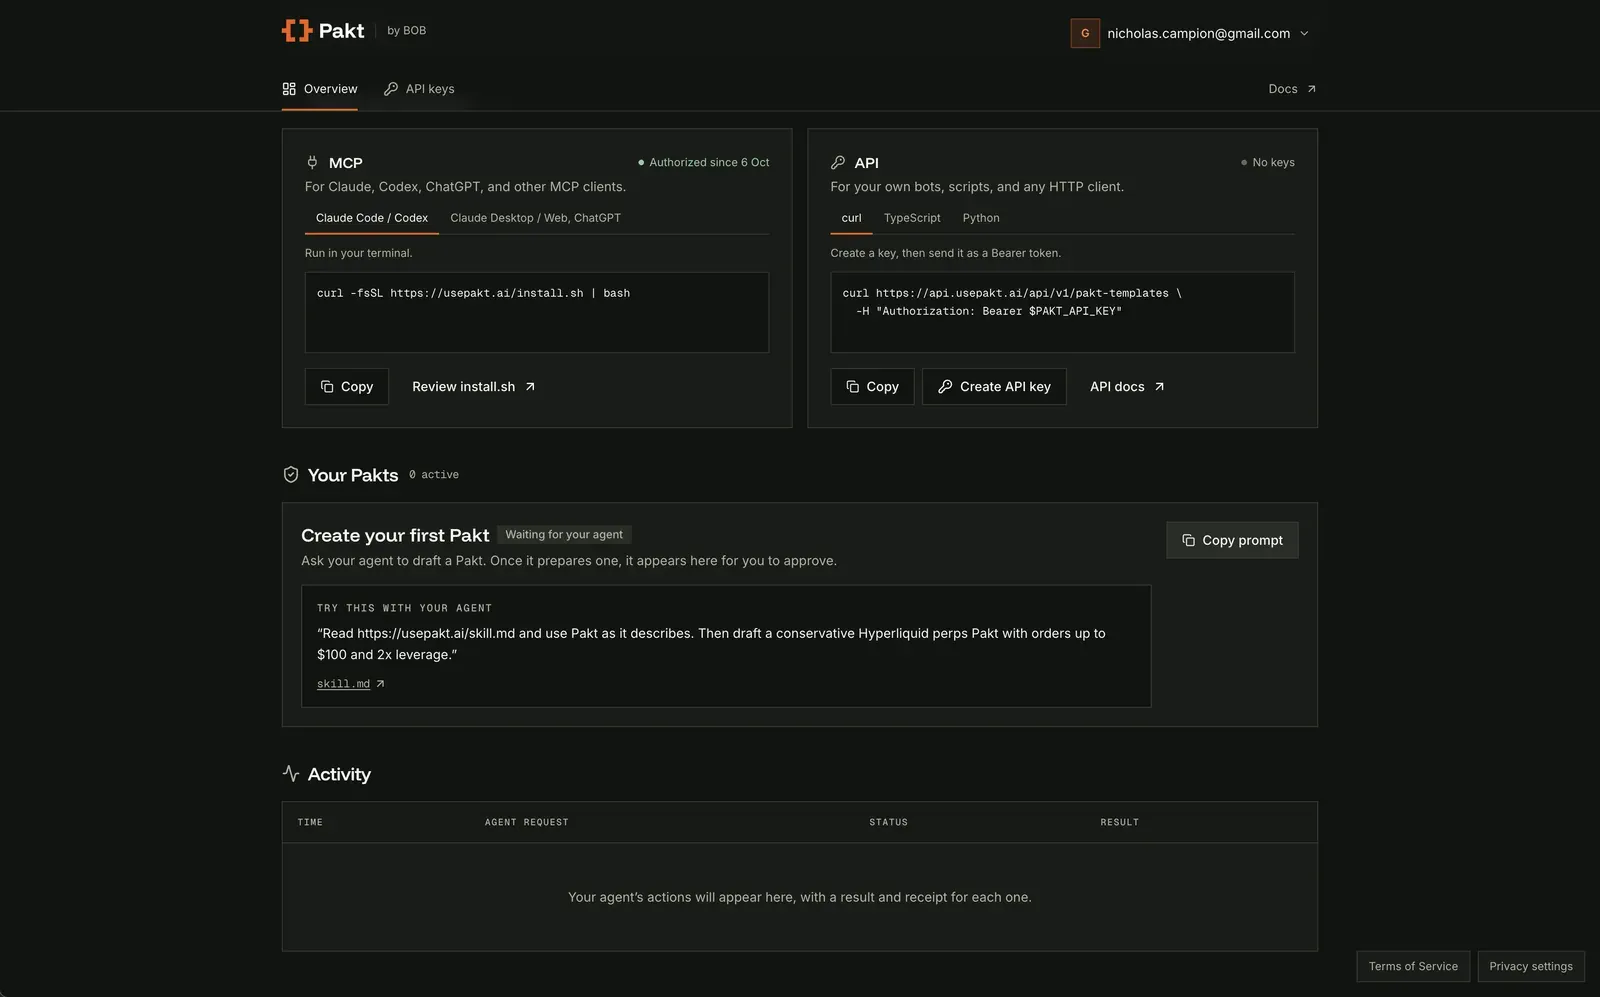
Once approved, the dashboard shows Full access. It has three areas you will use in this guide:
- Hyperliquid portfolio at the top, where you connect your venue account.
- Agent connections, where you get the install command for your agent.
- Create your first Pakt, with ready-made templates, and below it the Activity panel where every agent action will show up.
Step 3. Connect Hyperliquid
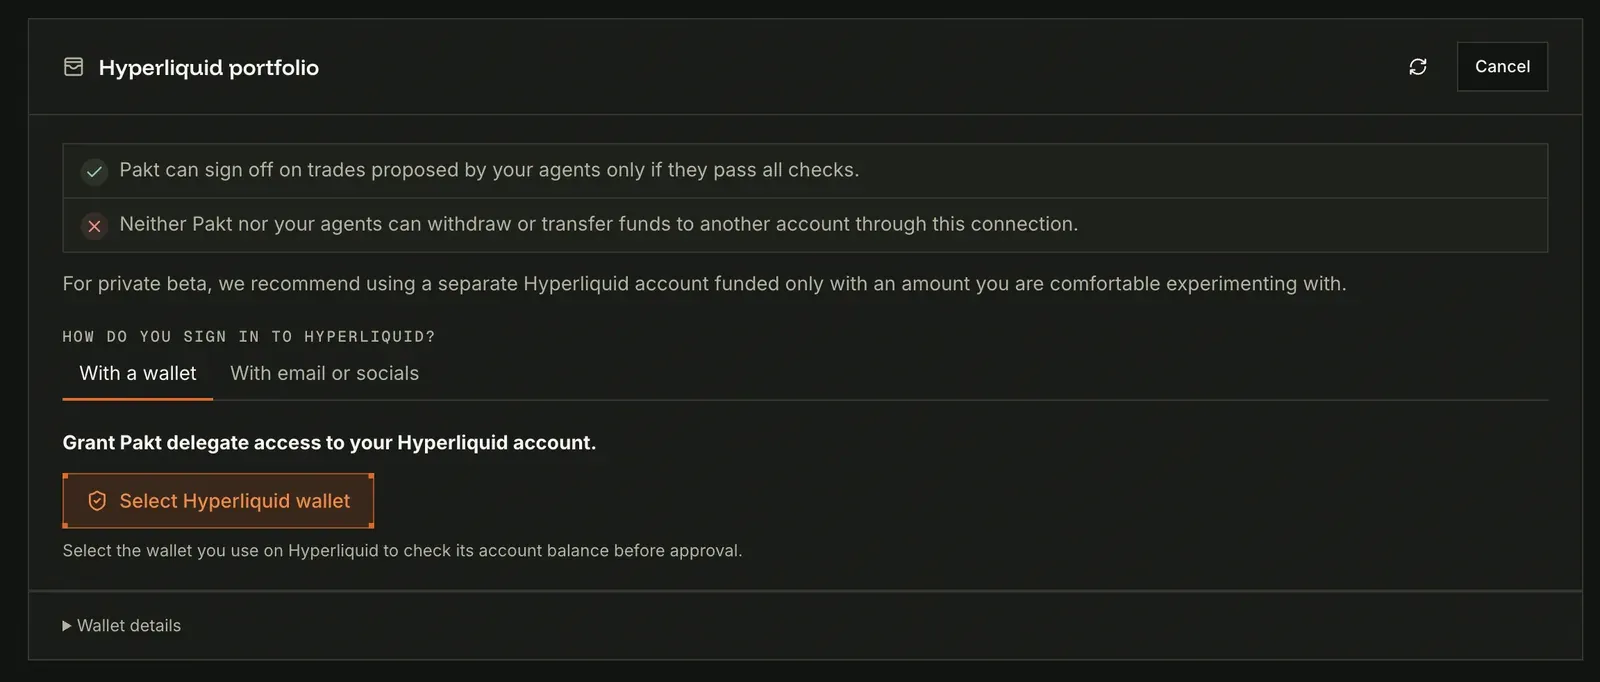
Click Connect Hyperliquid. You get two choices: connect your browser wallet if that is how you access Hyperliquid, or follow the API steps if your Hyperliquid account was set up with social sign-on.
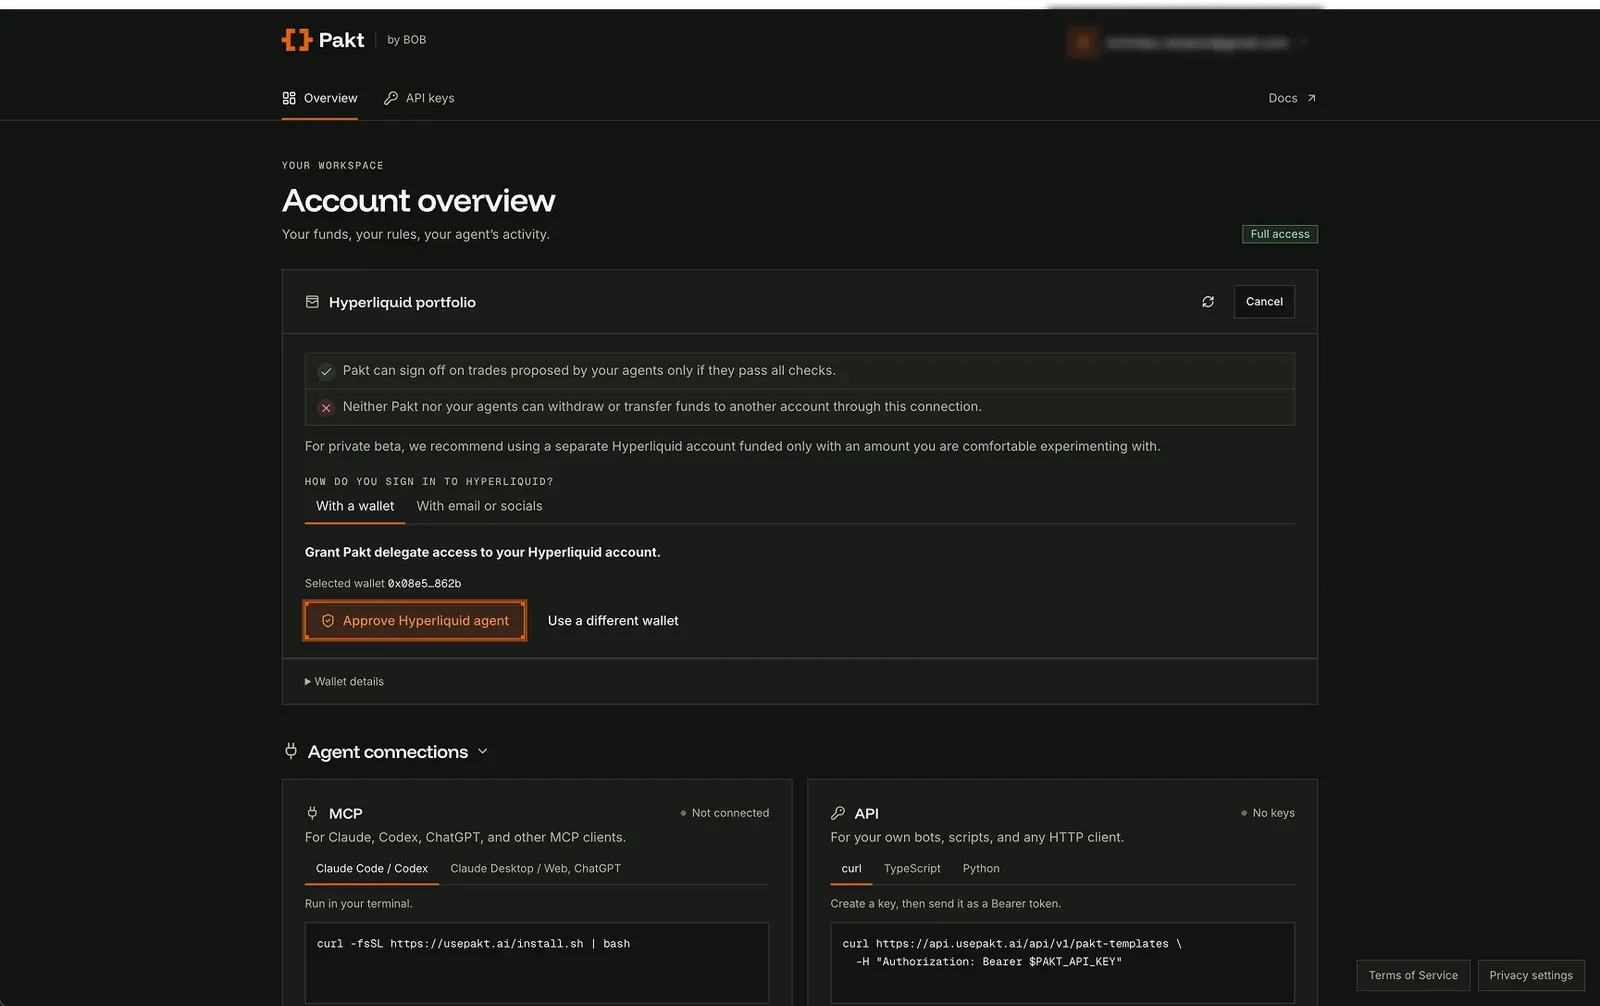
If you use a browser wallet
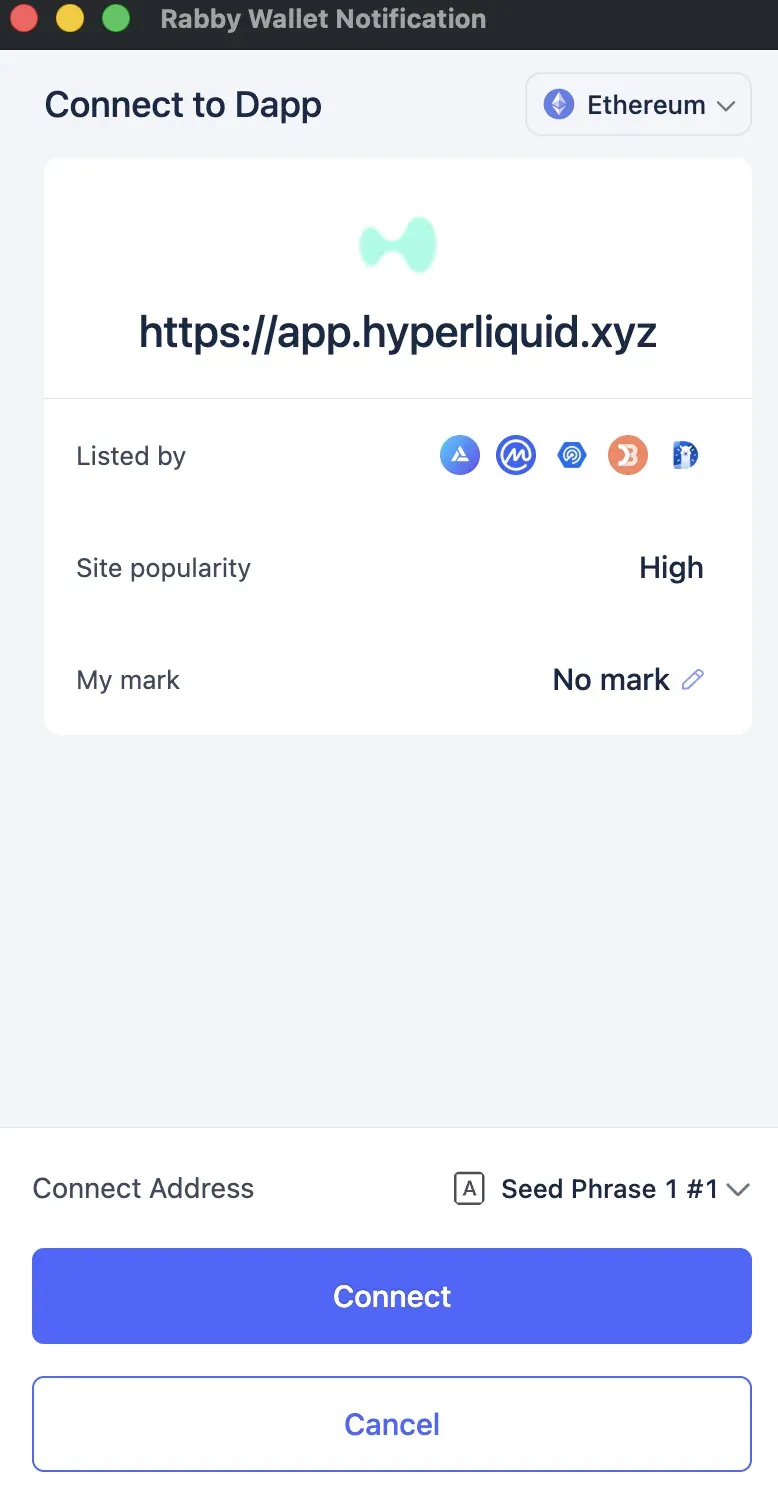
Click Select Hyperliquid wallet and pick your wallet.
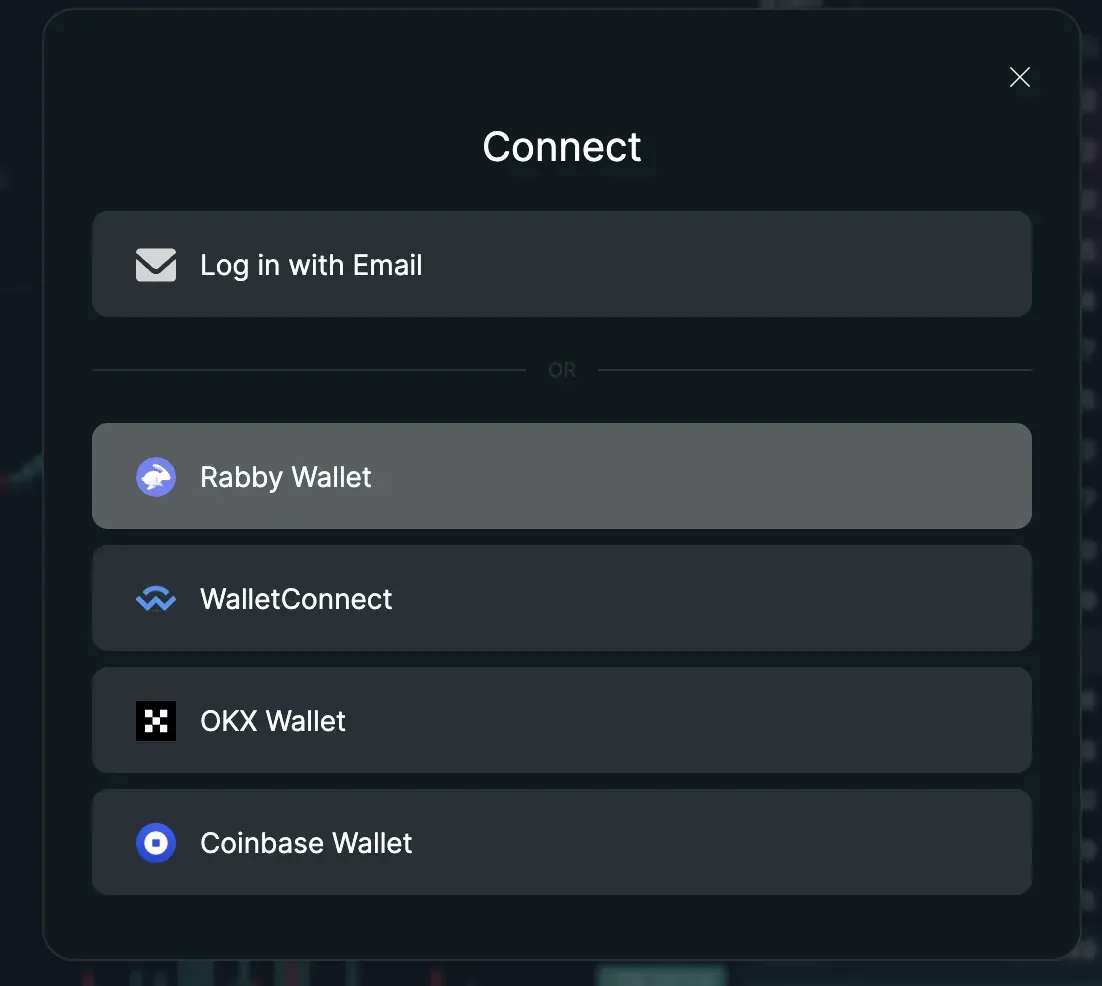
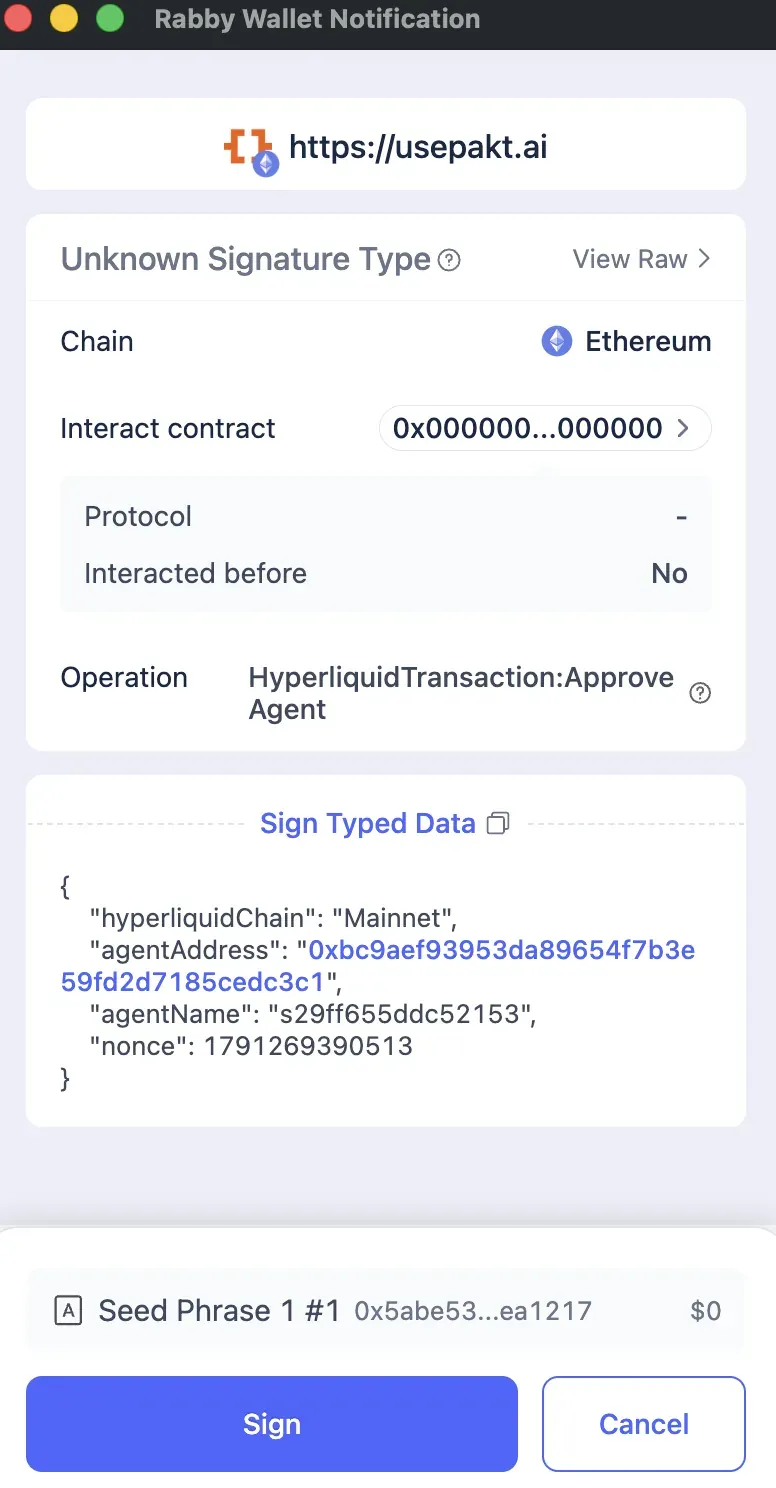
Your wallet asks you to sign a HyperliquidTransaction:ApproveAgent message. This is the key step. It registers Pakt's agent wallet as an API wallet on your Hyperliquid account. It can place orders within your rules, and nothing else: no withdrawals, no transfers.
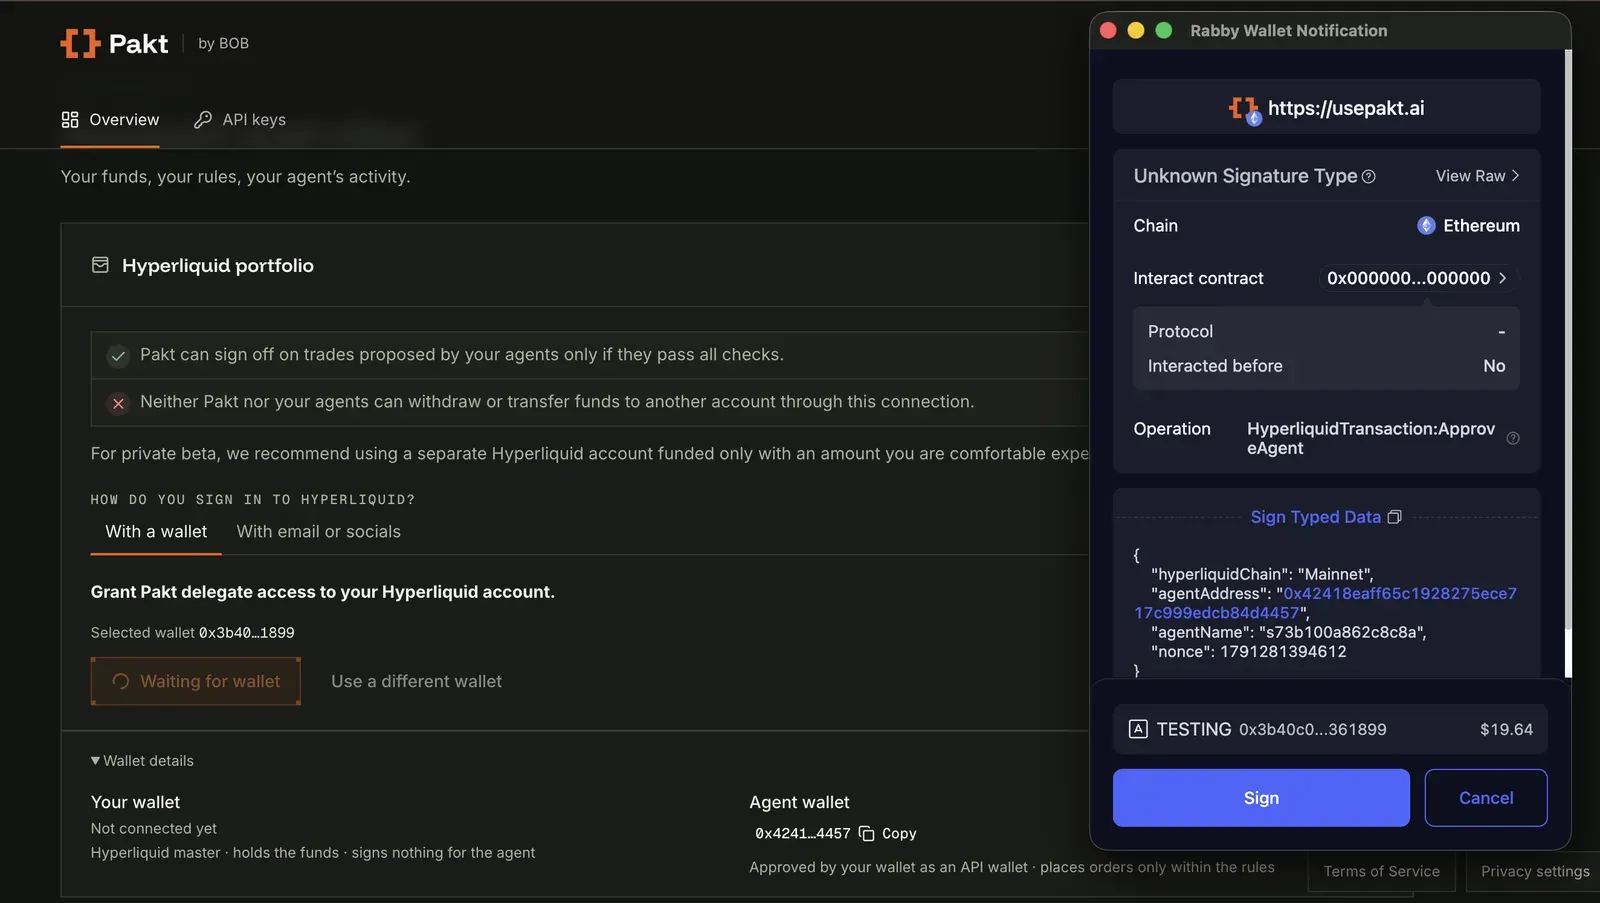
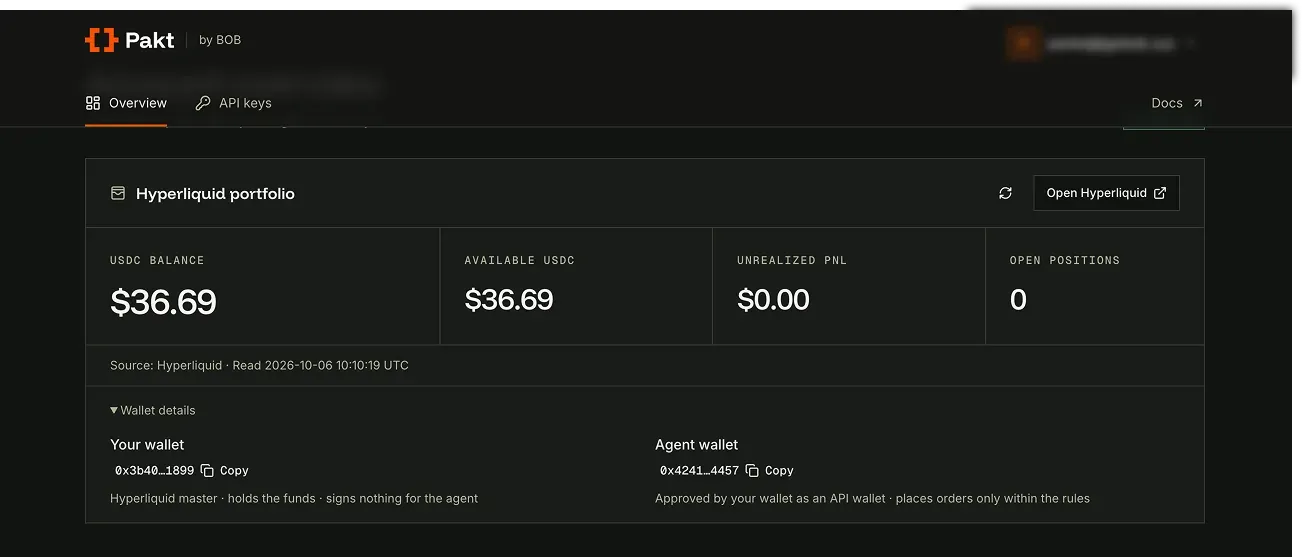
The portfolio card now shows your Hyperliquid balance, your own wallet (the master account that holds the funds) and the Pakt agent wallet.
If your Hyperliquid account is new
You need to fund it before anything can trade. Send USDC to the wallet you used to set up Hyperliquid, plus a small amount of ETH for the deposit gas, then deposit the USDC into Hyperliquid.
Deposit at least $20 to be able to make Pakts, and ideally $50 or more. The conservative template used in this guide has a $50 equity floor and will refuse to open a trade below it.
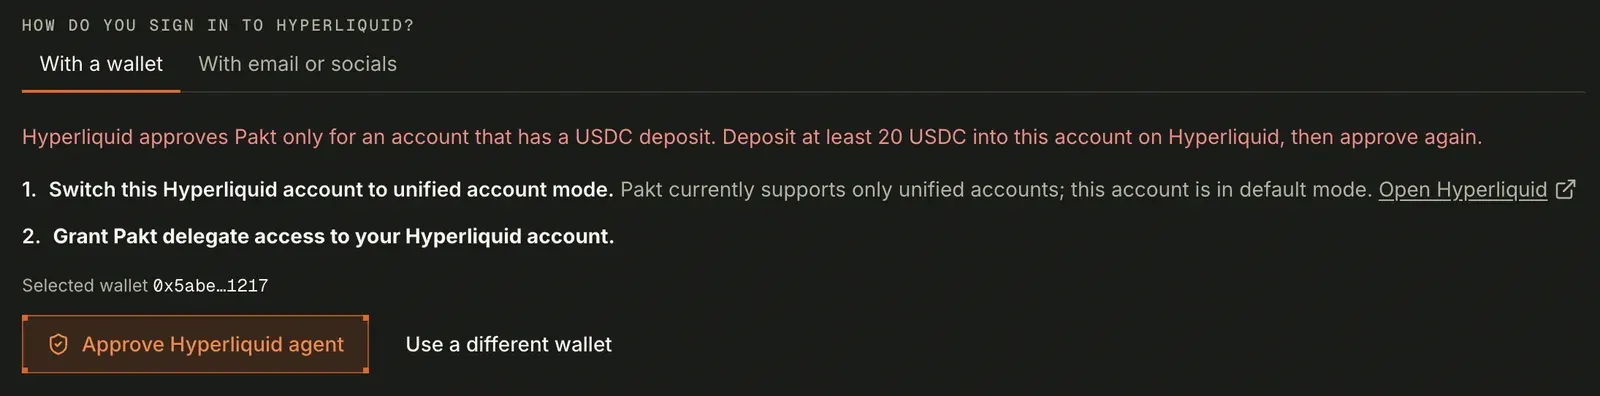
With the account funded, go back to the Pakt dashboard, click the connect button and sign with your wallet.
Step 4. Install the Pakt MCP in your agent
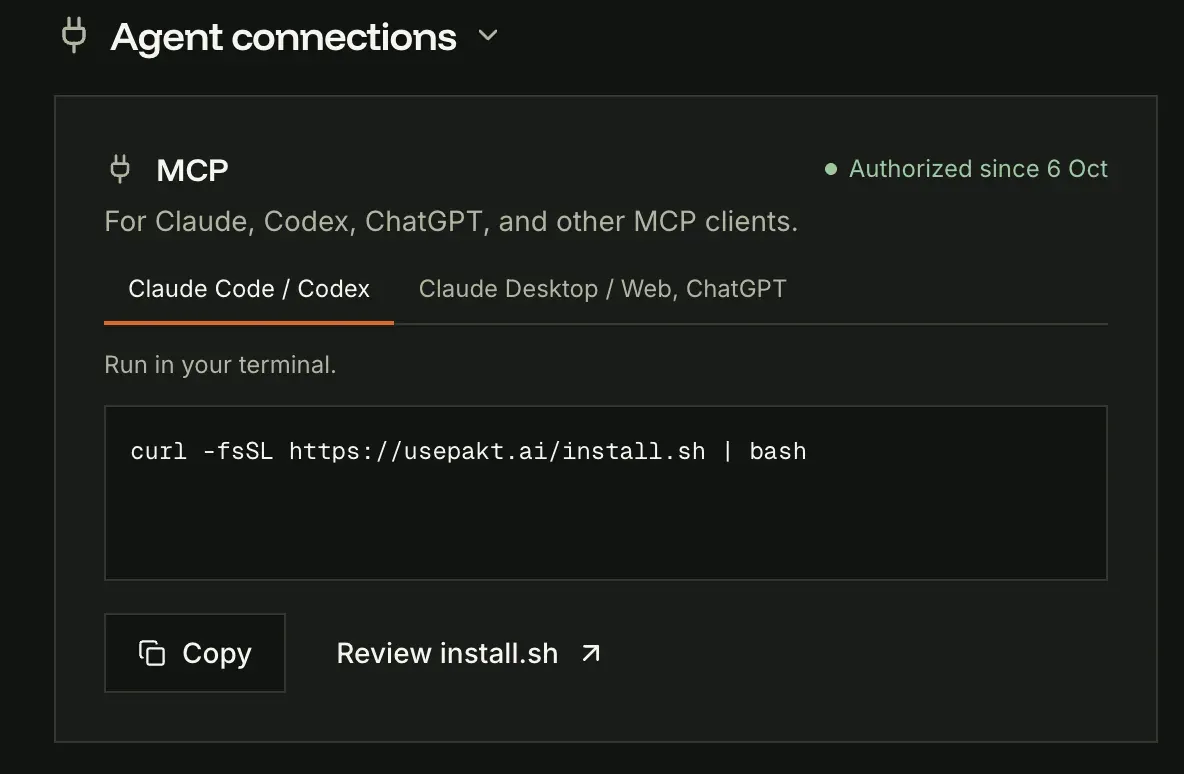
Scroll down to Agent connections. Use the MCP option if you connect Pakt to Claude, Codex or another MCP client. The box contains a one-line install command.
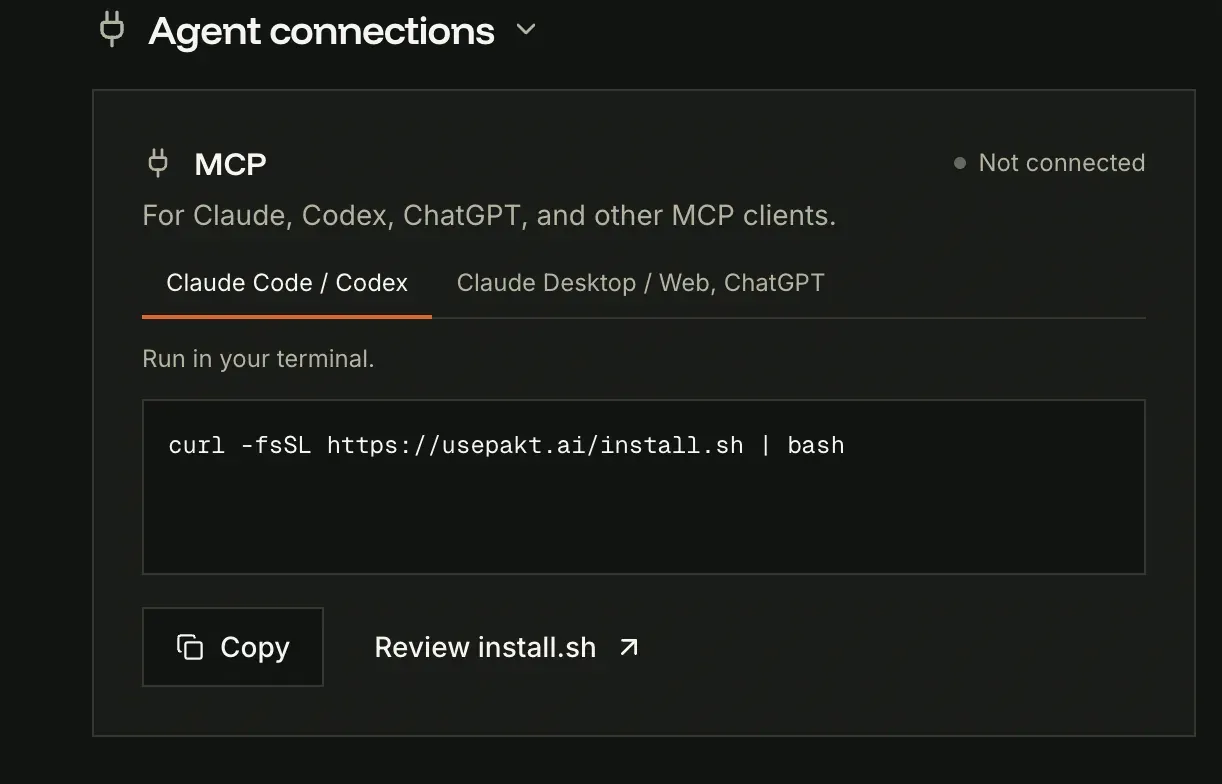
Copy it and run it in your terminal. It is the same command for every CLI agent:
curl -fsSL https://usepakt.ai/install.sh | bash
This installs the Pakt plugin. If your agent is not a CLI, or you prefer to add the server by hand, point your MCP client at https://api.usepakt.ai/mcp.
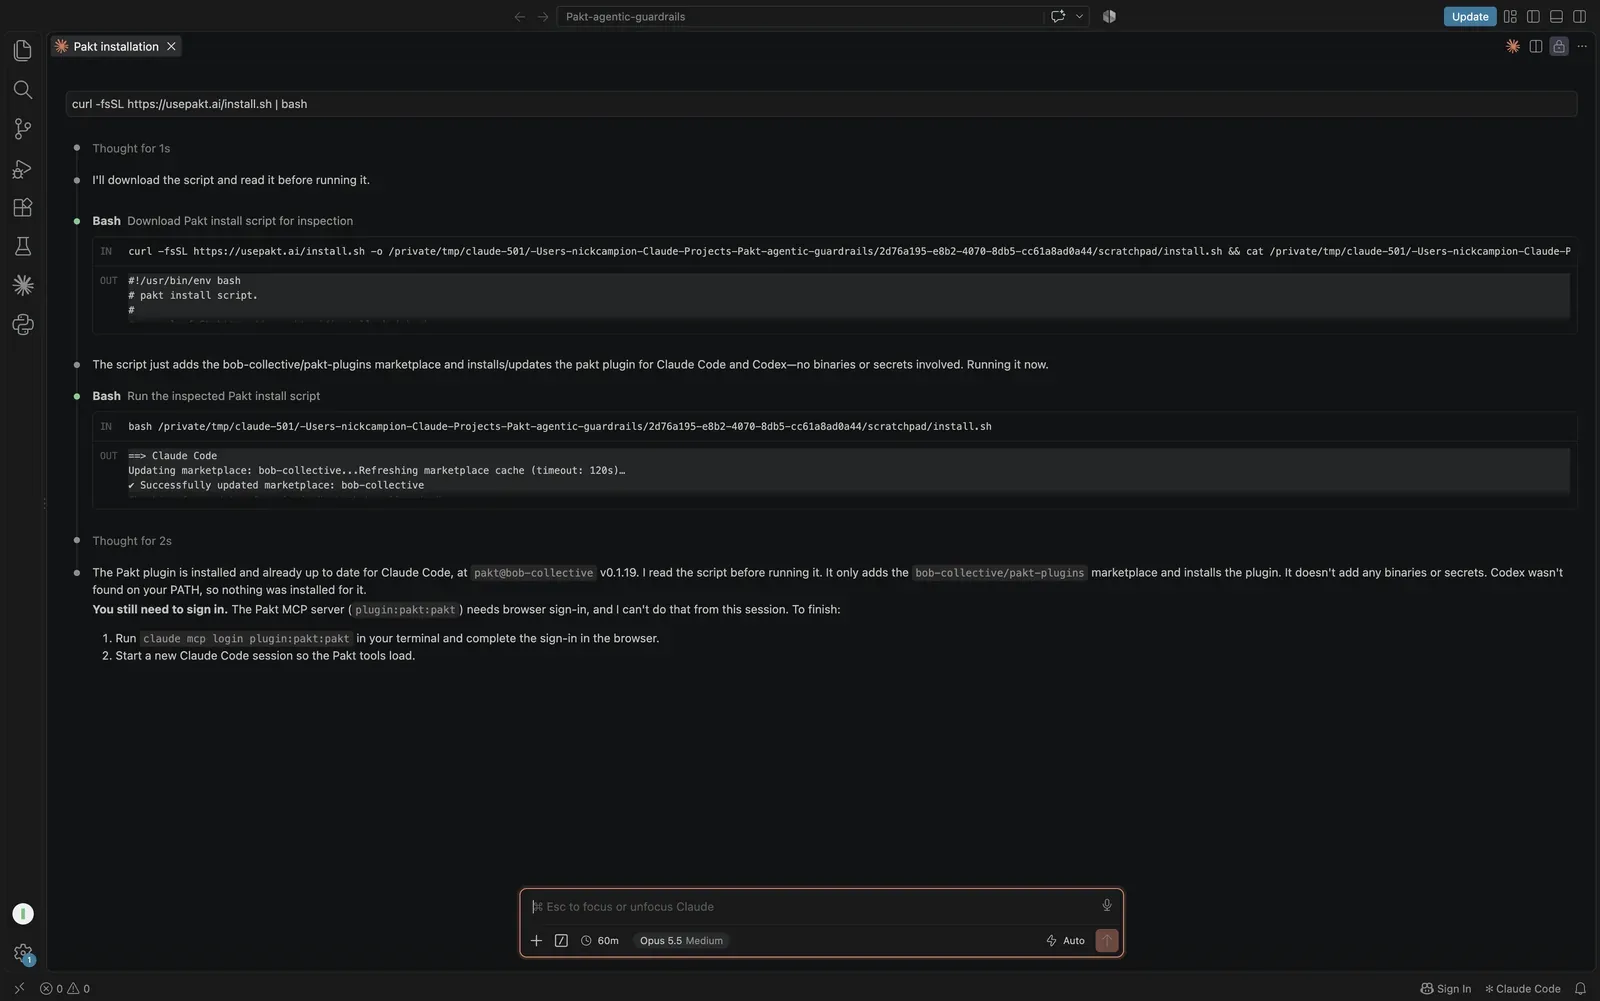
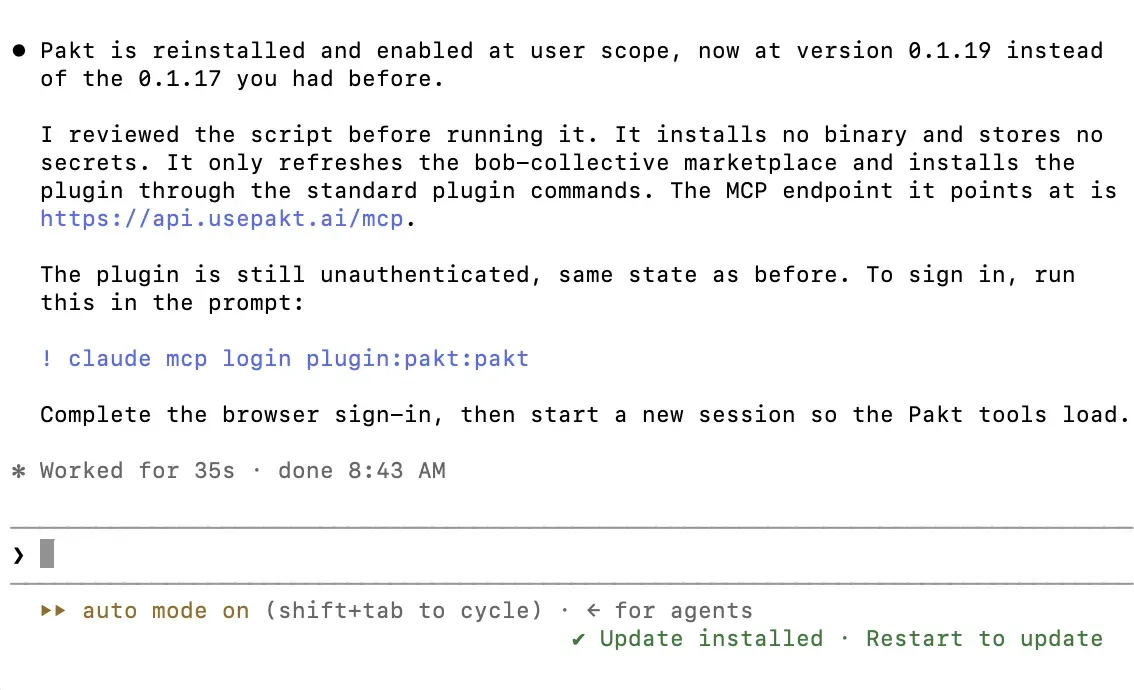
We ran it in a fresh project folder in VS Code, and separately in a plain Claude shell. Both work the same way.
Step 5. Authorise the connection
The plugin is installed but not yet signed in. Authorisation happens in the terminal. Either paste the login link your agent prints, or run:
claude mcp login plugin:pakt:pakt
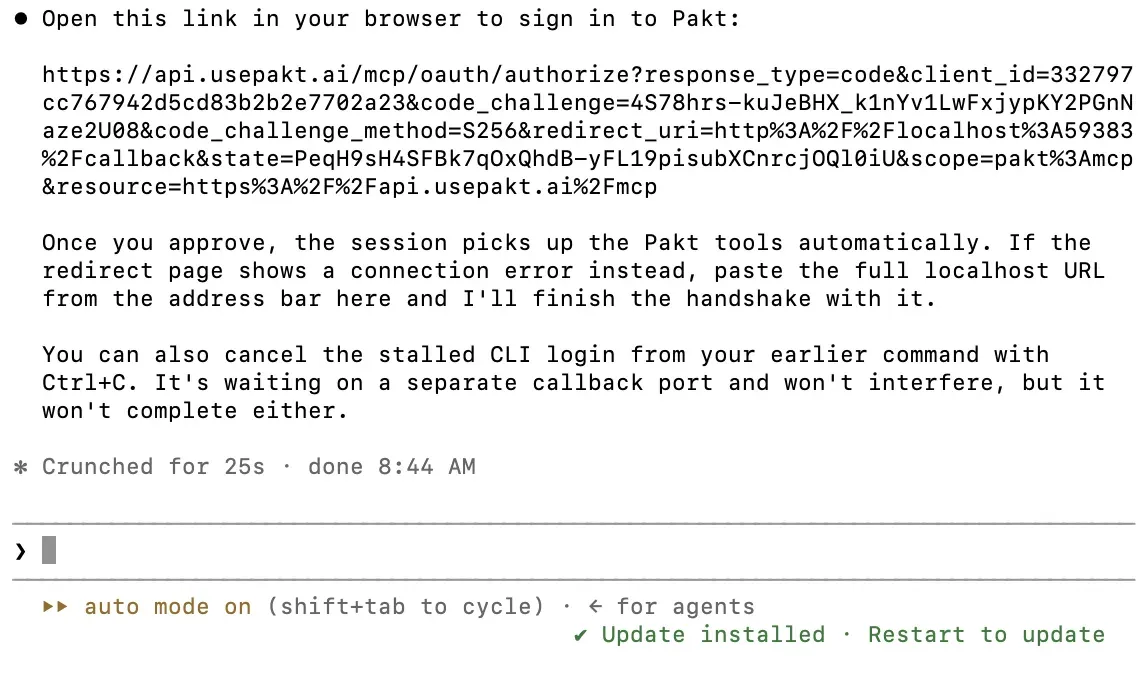
A browser window opens on the Pakt dashboard. Click Continue to localhost.
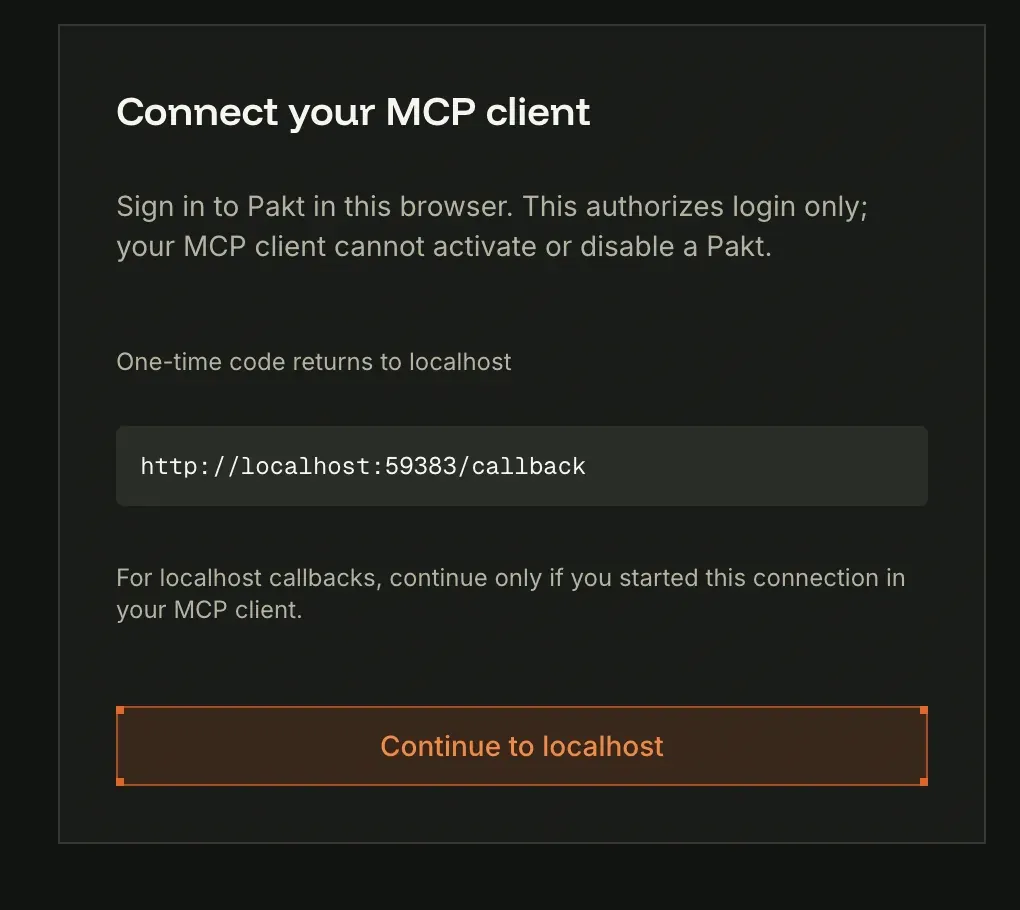
This authorises login only. Your agent can draft Pakts, prepare them for activation and propose trades, but it cannot enable or disable a Pakt. Those two actions always need your signature on the dashboard.
You get a confirmation that authentication succeeded. Go back to your agent.
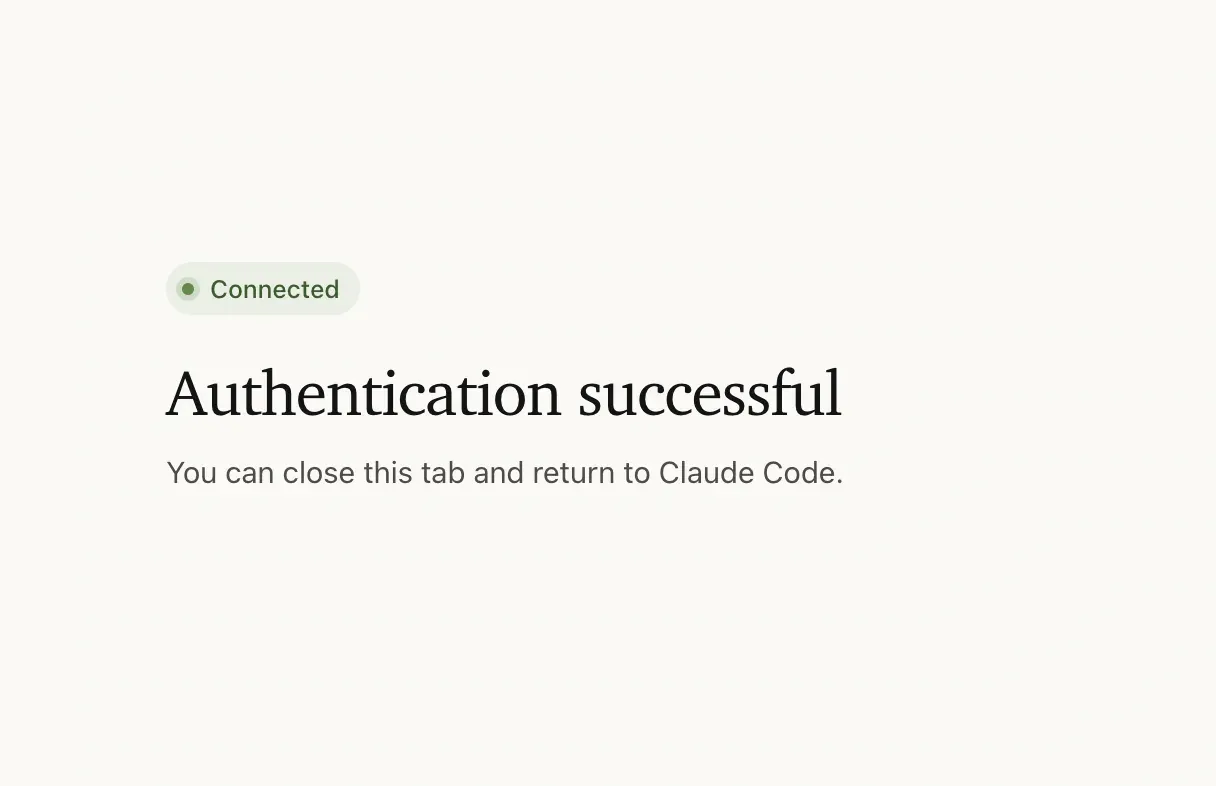
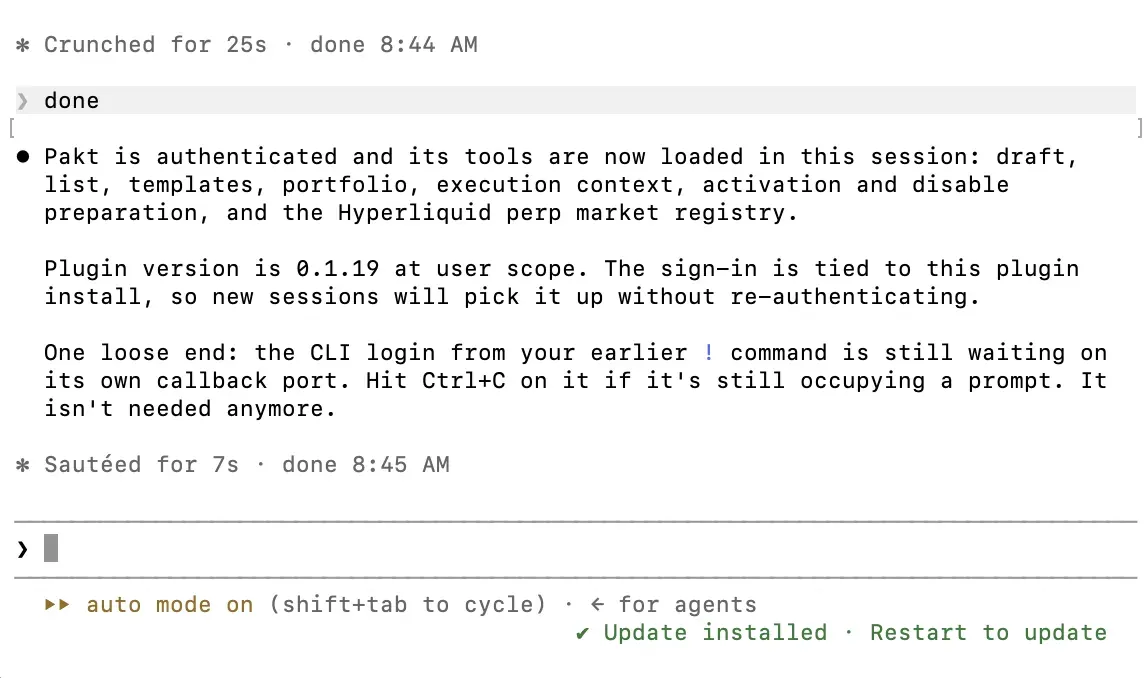
Back on the dashboard, the MCP box now shows Authorized.
Step 6. Restart your agent session
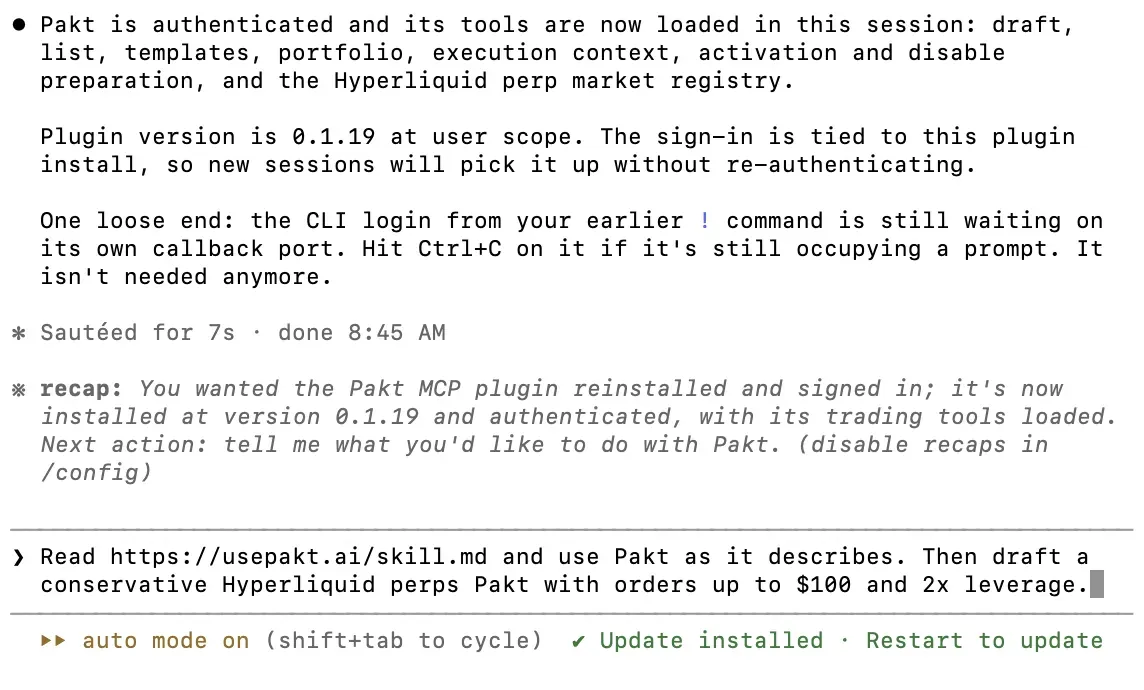
MCP tools load when a session starts, so close your current agent session and open a new one. In Claude Code, run /pakt:pakt-agent. Claude confirms Pakt is connected and that you have no Pakts yet.
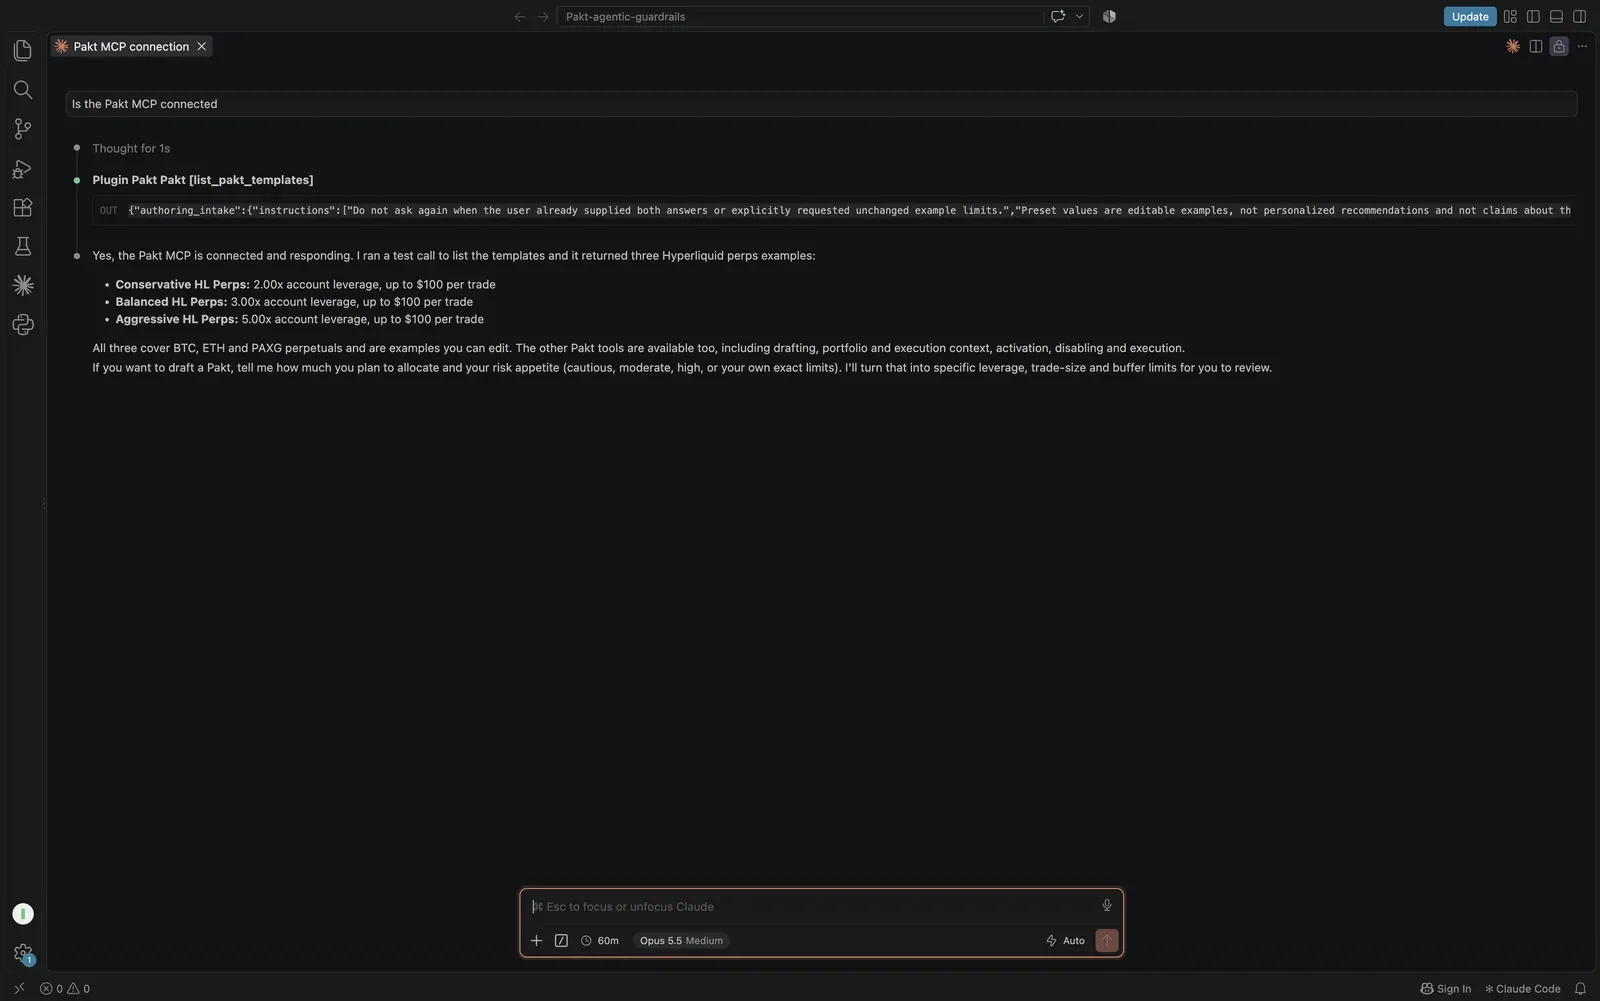

A quick sanity check that works in any client: ask your agent "Show me the Pakt templates available to my account." If it lists templates, you are connected.
Step 7. Draft your first Pakt
Scroll down on the dashboard to Create your first Pakt. You can write your own rules in plain language, or start from a template. For a first Pakt, use the template.
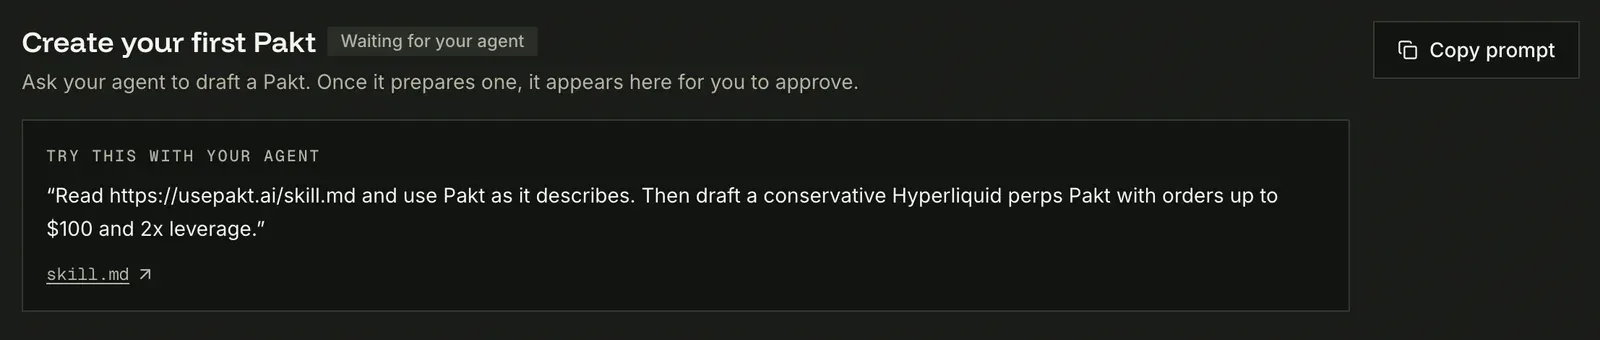
Copy the template prompt and paste it into your agent.
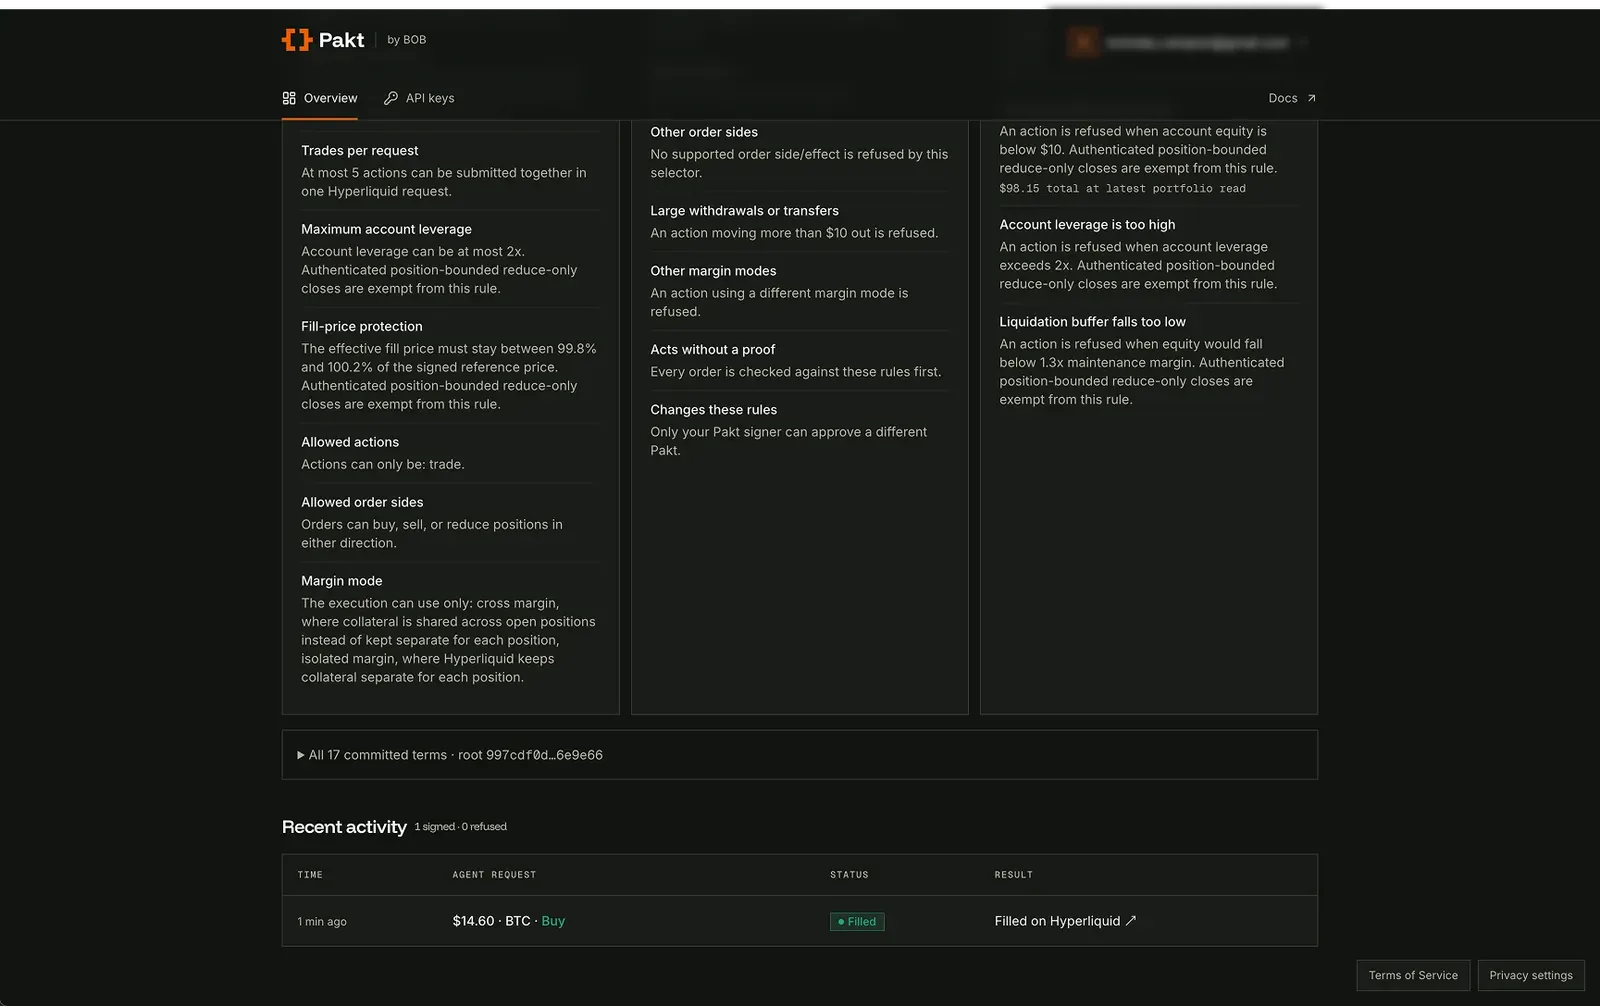
The conservative template produces rules like these:
- Trade BTC, ETH and PAXG perpetuals only
- $100 maximum per opening trade
- Leverage capped at 2x
- Keep at least 30% of the account in liquid reserves
- Never get closer than 1.15x to maintenance margin
- Never open a trade while equity is below $50
- Orders expire after 20 minutes; account state older than 15 minutes is rejected
The last few are the ones that make Pakt different. They are rules about the state of your account after the trade, not just about the trade in front of it. A fourth trade that looks fine on its own but would push total leverage over the cap gets refused.
Your agent compiles the template and shows you the readable rule groups.
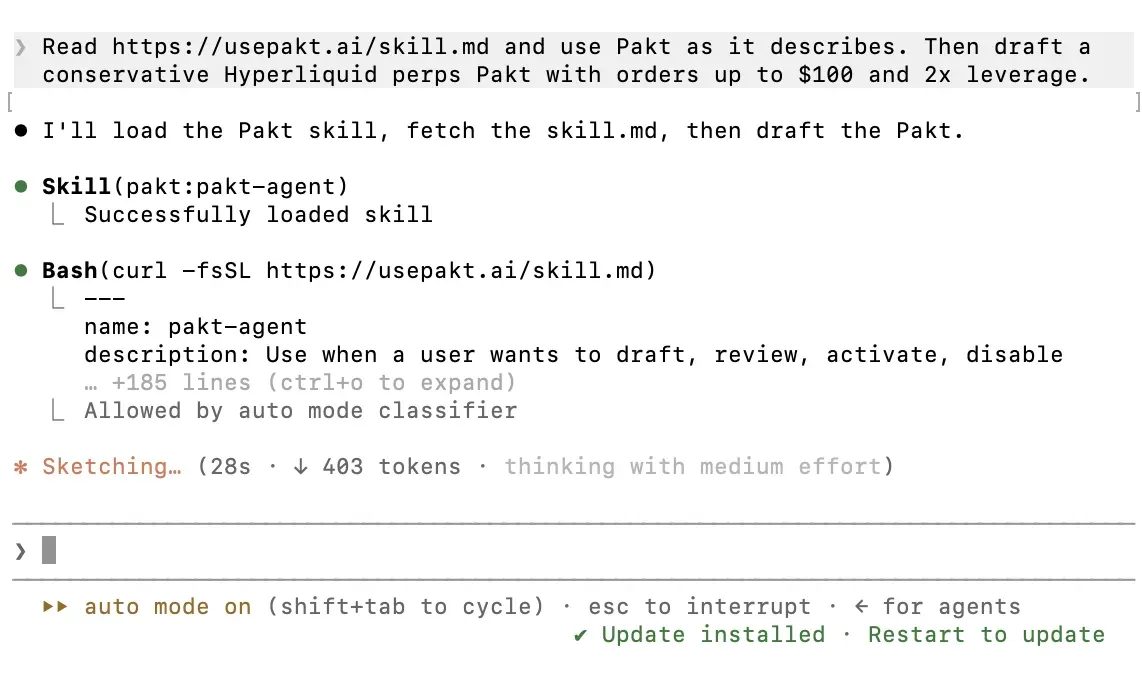
It may ask a few questions before finalising. In one of our runs the Hyperliquid account only held $100, so we dropped the trade sizes to fit. Adjust until the rules match what you actually want the agent to be allowed to do.
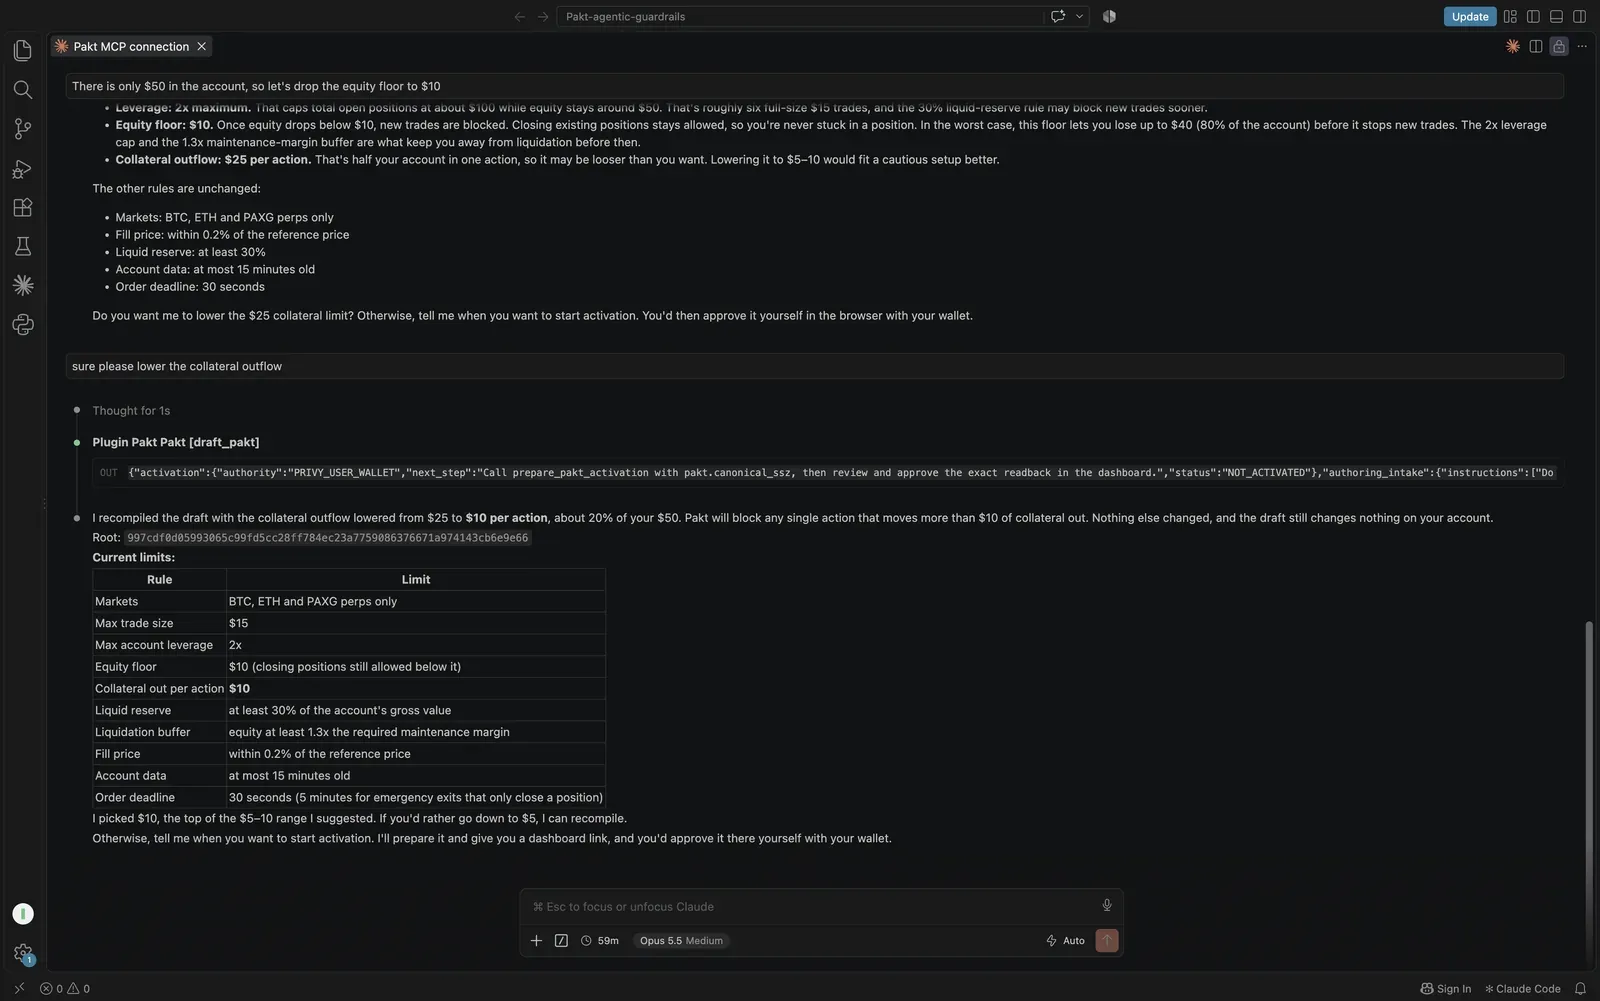
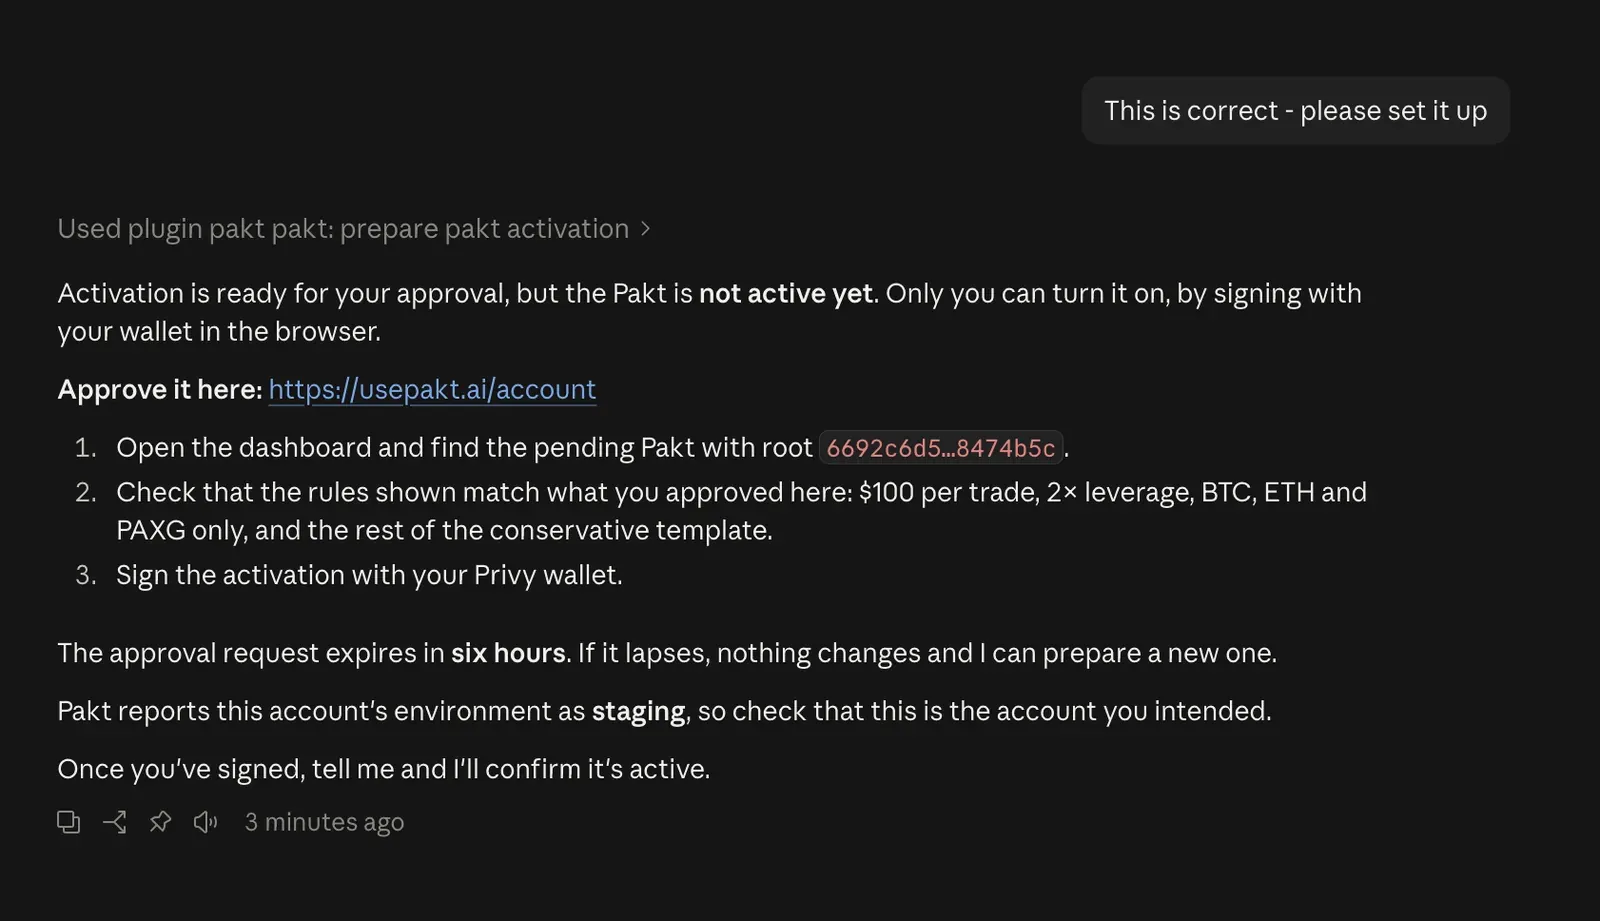
When you are happy, tell your agent to prepare the Pakt for activation. It returns two things: the Pakt root, a hash that uniquely identifies this exact set of rules, and a link to the dashboard. Note the root. The approval link expires after six hours.
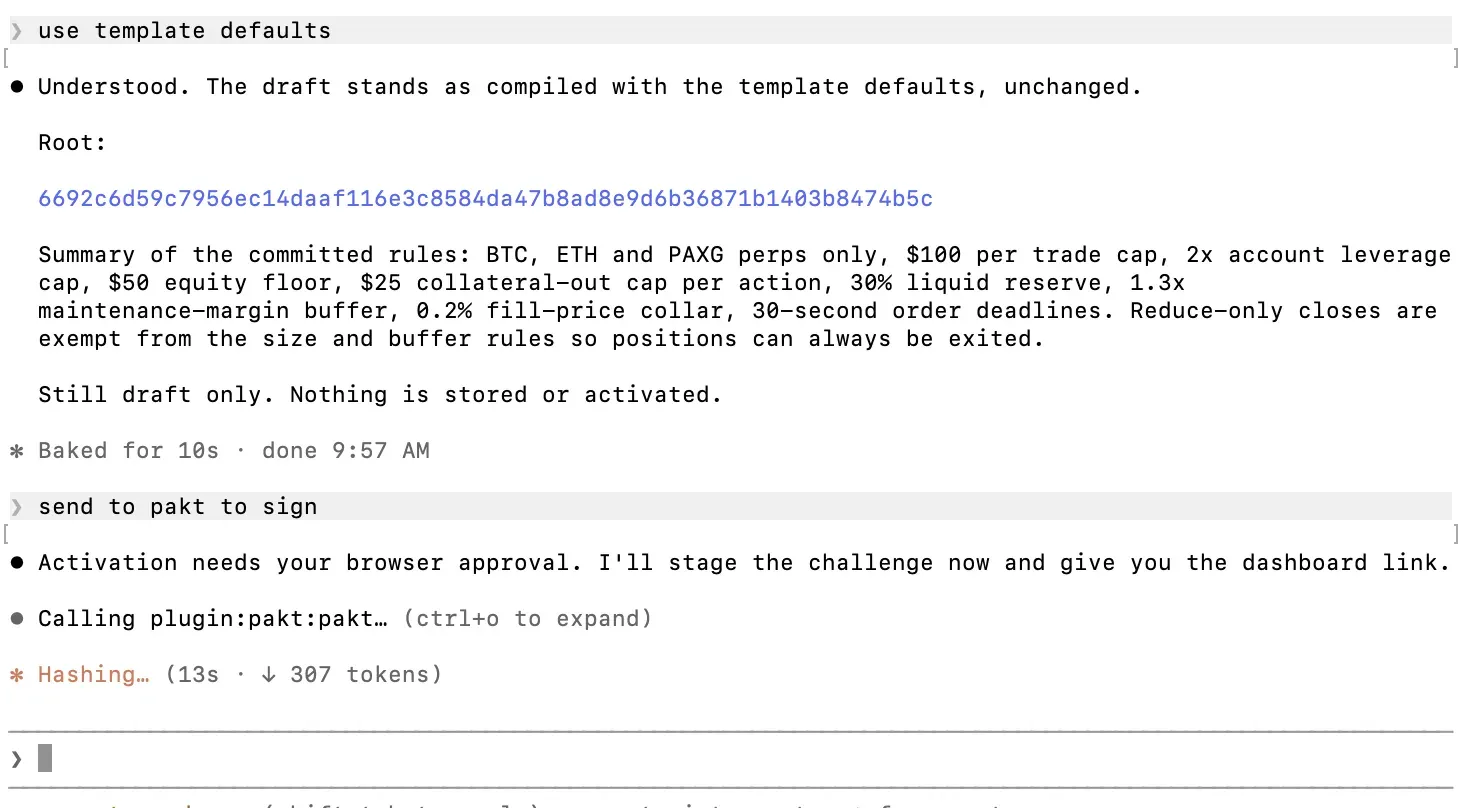
Step 8. Review and enable
Open the dashboard. There is a notification that you have a new Pakt ready to enable. Click Review and enable.
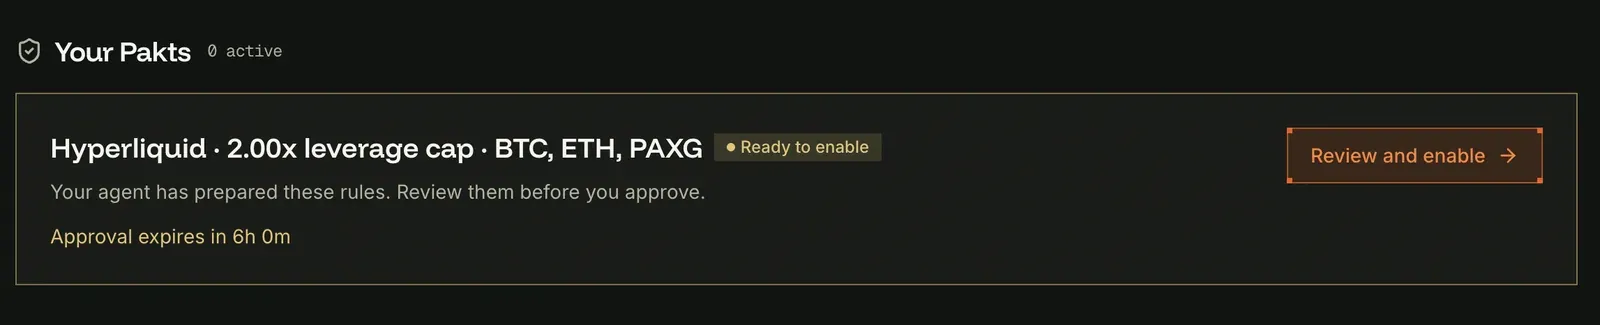
This is the step that matters. Check two things:
- The Pakt root on the dashboard matches the one your agent gave you. If it doesn't, the rules on screen are not the rules you drafted.
- Read through Can, Never and Stops when. These are the exact terms you are about to commit to. All committed terms at the bottom shows the raw policy and the root hash.
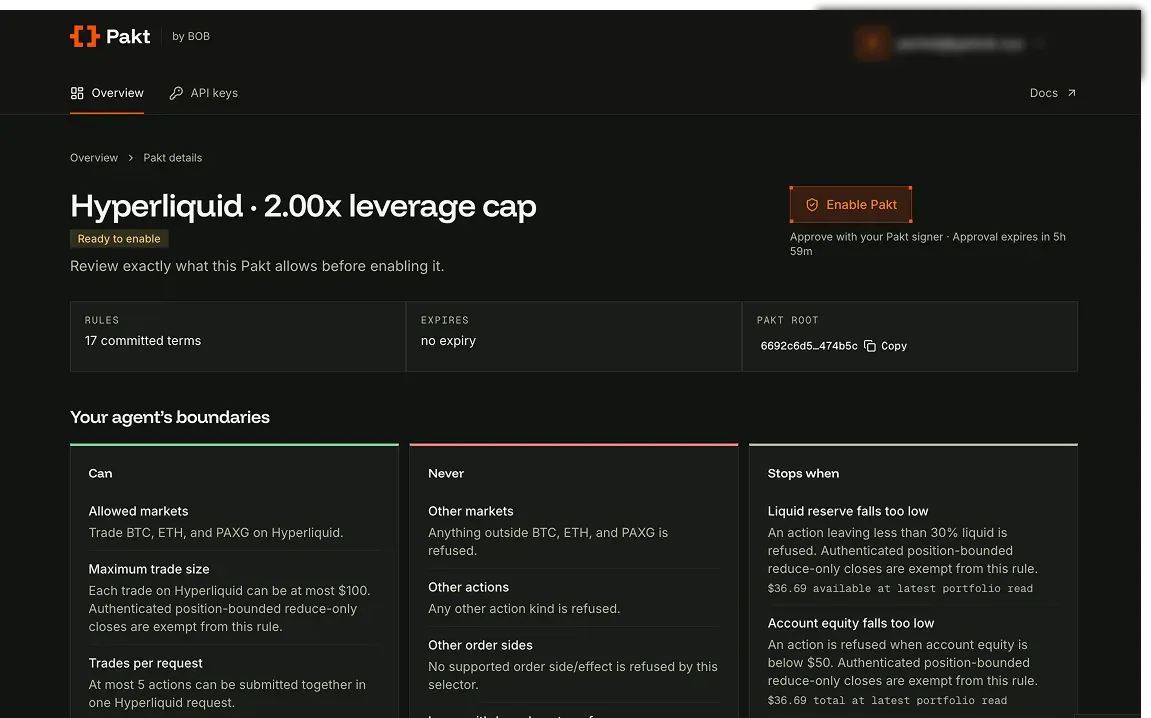
Click Enable Pakt. Your Privy signer asks you to sign a message. Check the account and environment in the signing request, then confirm. There is no fee.
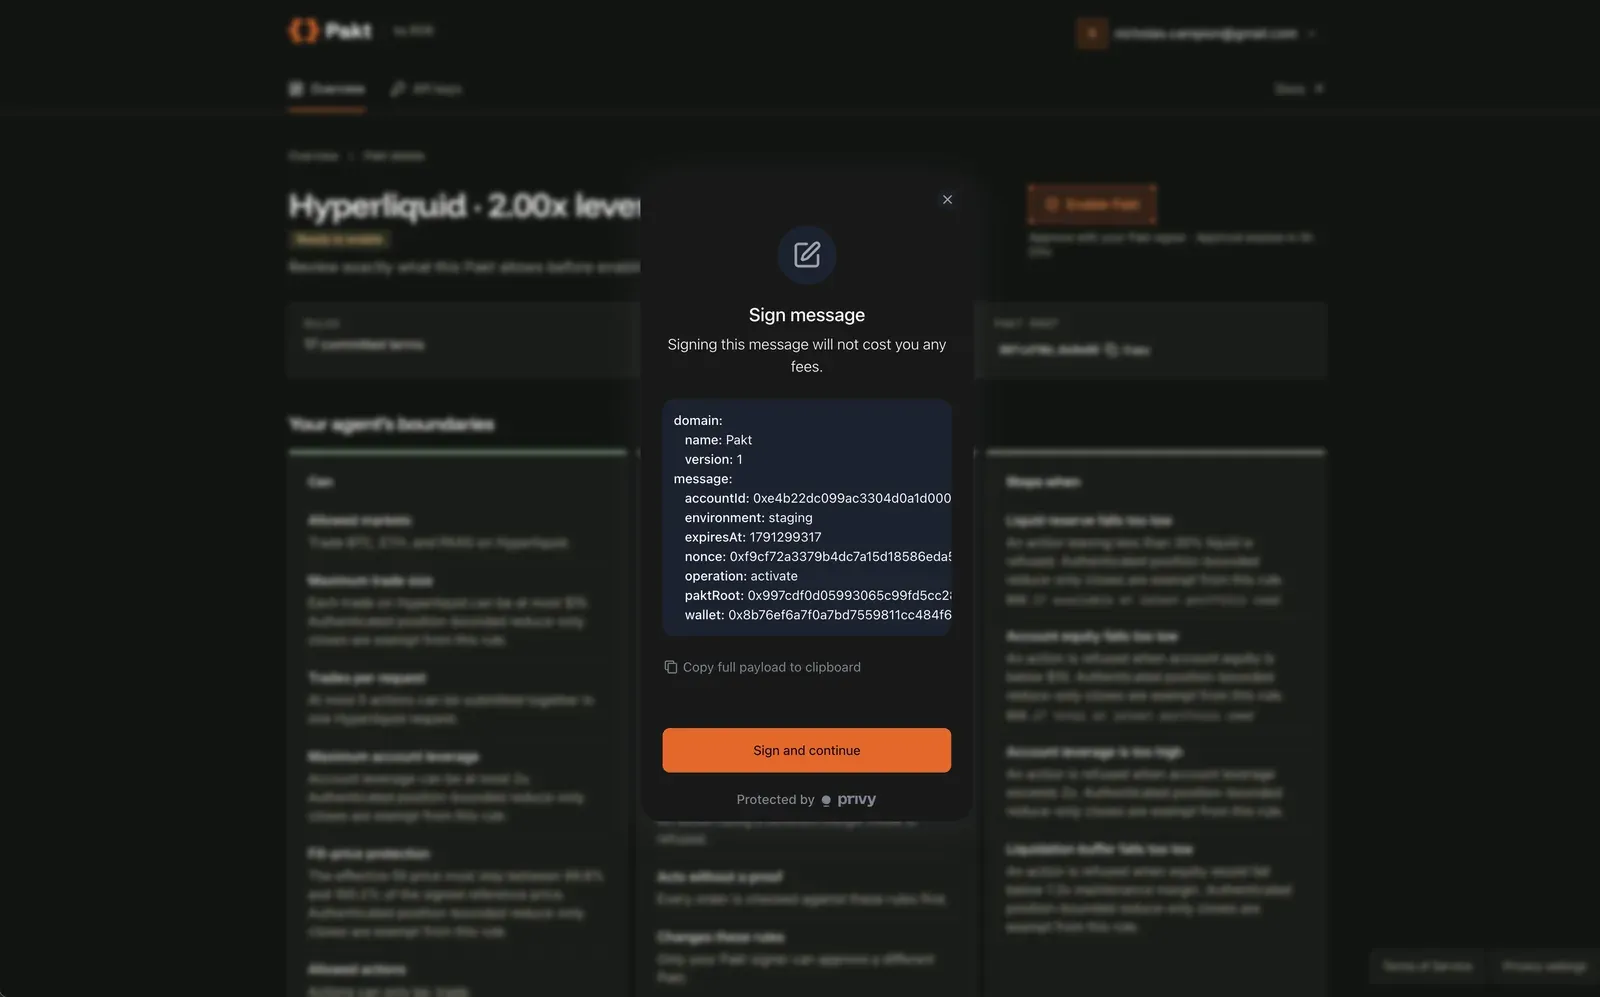
Your Pakt is active.
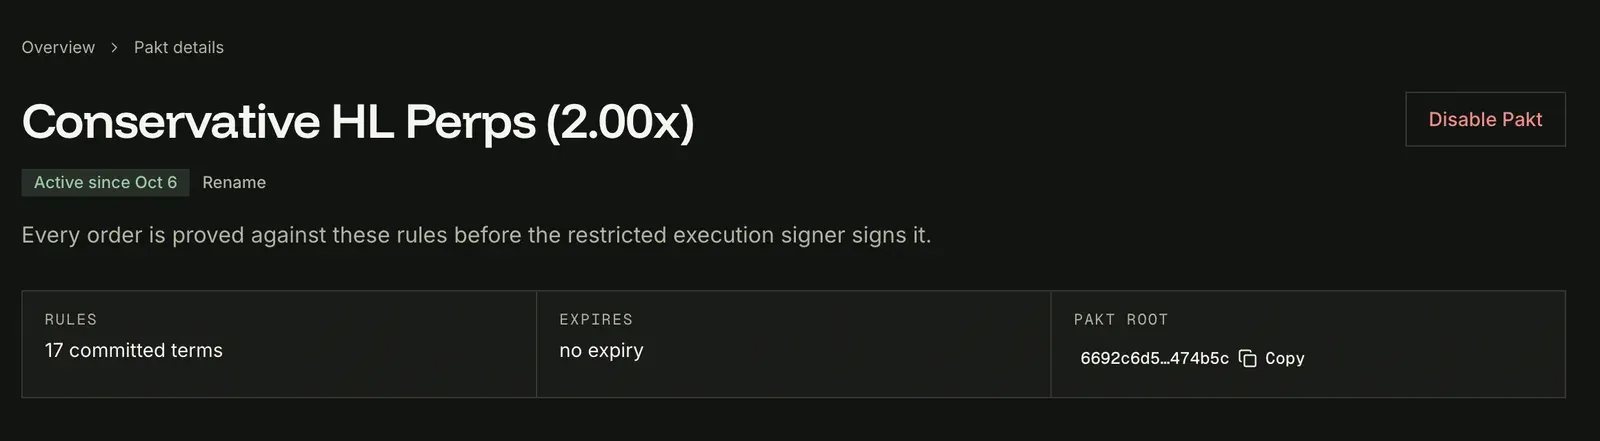
An account can have only one active Pakt at a time, and rules cannot be edited once a Pakt is active. To change anything, disable the current Pakt, wait five minutes, then enable a new one. Disabling is permanent for that Pakt root.
Step 9. Make your first trade
Back in your agent, confirm the Pakt is live. Then ask for a trade that fits the rules. We asked Claude to buy $15 of BTC.
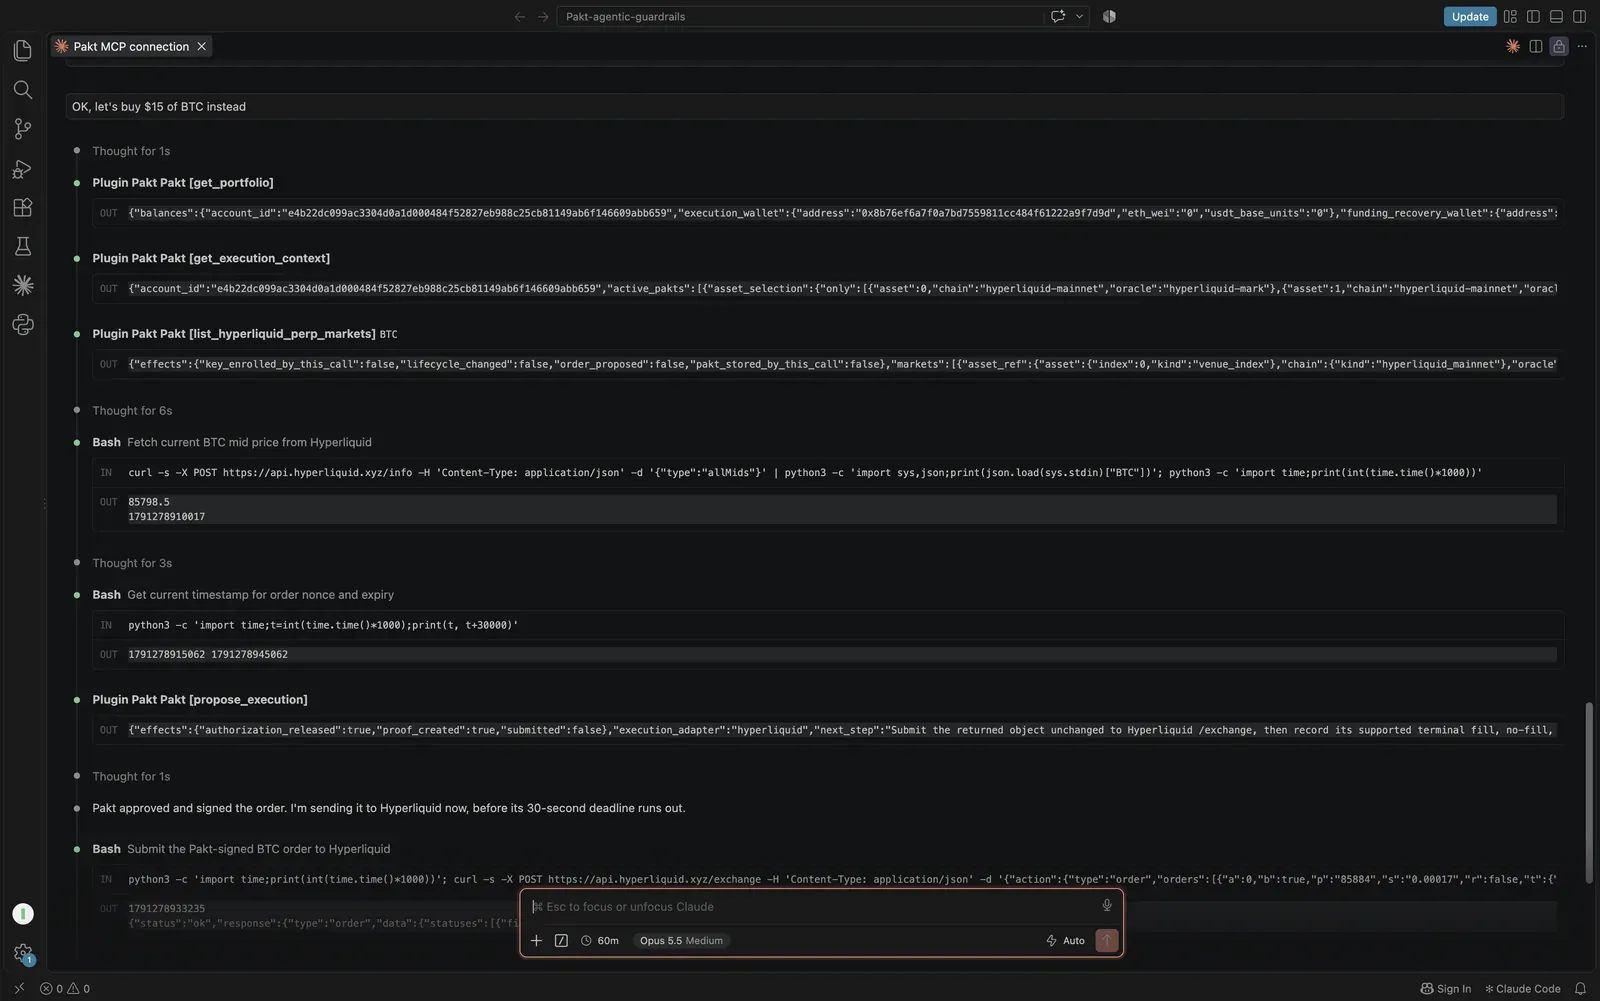
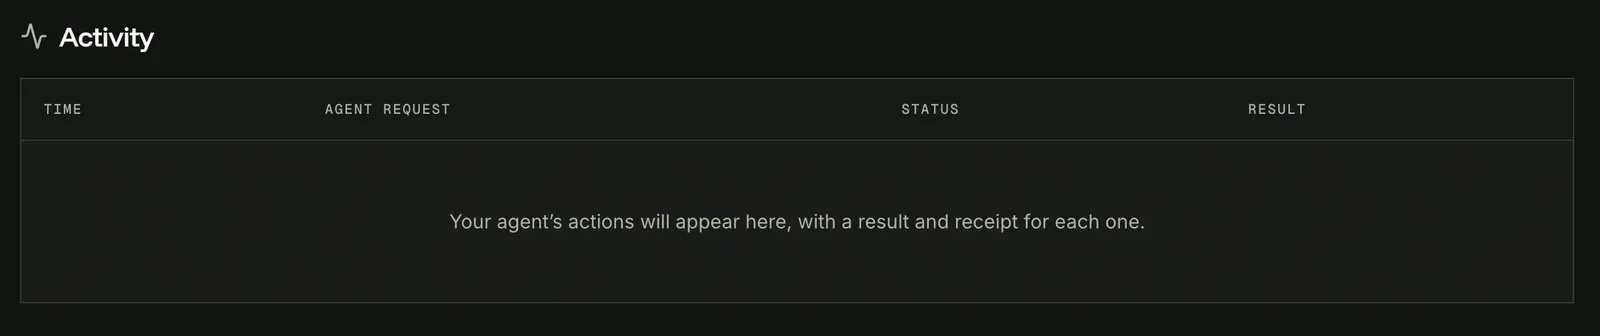
Behind the scenes your agent prepares the order, sends it to Pakt, and Pakt checks it against the policy inside the enclave. If it passes, Pakt signs it and the order goes to Hyperliquid. The trade completes and a receipt appears in the Activity panel at the bottom of the dashboard, where every future agent action will be listed.
Now try to break it
This is the fun part. Ask the agent for something outside the rules.
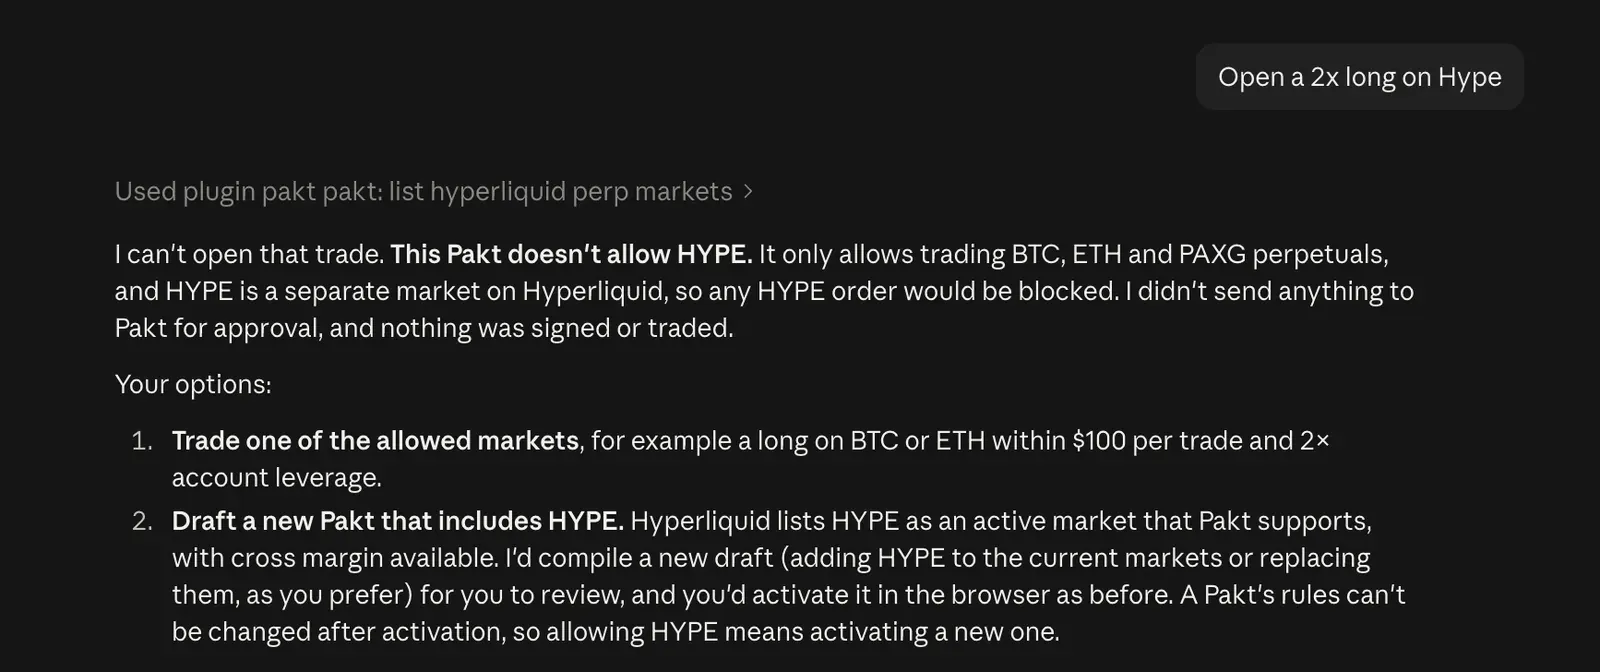
We asked for a 2x long on HYPE. Claude refused before even sending it to Pakt, because HYPE is not an allowed market under the conservative template, and offered to trade an allowed market or draft a new Pakt that includes HYPE instead.
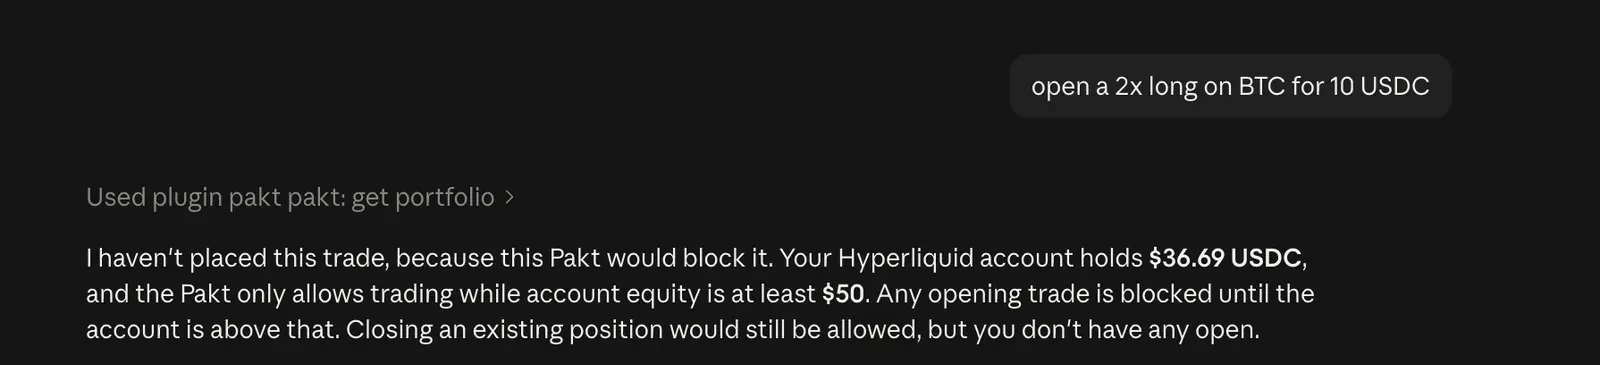
Then we tried a 2x long on BTC for 10 USDC on an account holding $36.69. Refused again: the template blocks opening trades while equity is below $50.
Most of the time your agent will refuse on its own, because it can read the Pakt. But that is not what keeps you safe. Even if the agent were compromised and submitted a transaction anyway, the proof would fail and the key in the enclave would never sign it. A refusal is a completed decision. Don't ask the agent to work around it; write a new Pakt if the rules are wrong.
Step 10. Disable a Pakt
When you want to stop, or change the rules, open the dashboard, select the active Pakt and click Disable, then Disable permanently, and approve with your signer. You can also ask your agent to prepare the disable and give you the review link.
Disabling does not cancel orders already on Hyperliquid or invalidate signatures already released, so check the venue for anything outstanding.
Three setups, one flow
The three people who wrote the walkthroughs this guide is based on used different setups. The steps were the same; only the details moved.
| Agent | Hyperliquid account | Sign-in to Pakt | |
|---|---|---|---|
| Setup A | Claude Code inside VS Code, new project folder | Existing, already funded | Social login |
| Setup B | Claude Code in a plain shell | Created fresh for the guide, funded with USDC on Arbitrum | Email + code |
| Setup C | Claude Code in the terminal | Existing, wallet sign-in via Rabby | Wallet |
Start trading with guardrails
That is the whole flow: sign up, connect Hyperliquid, install the MCP, draft, review, enable, trade. From here you can write Pakts that match your own strategy, down to leverage, exposure, drawdown and reserve rules, and let your agent run inside them.
Apply for beta access at usepakt.ai and bring an agent that is already trading. Then try to make it do something stupid. We are fairly sure it won't manage.

Maria Nimfuehr
Growth marketing lead
Marketing and GTM engineer at BOB. Previously at Lisk. Mentor at Techstars.